IODD ST400 review: great idea, good product, terrible firmware
I’ve written about abusing USB storage devices in the past, with a passing mention that I’m too cheap to buy an IODD device.
Then I bought one.
I’ve always liked the promise of tools like Ventoy: you only need to carry the one storage device that boots anything you want. Unfortunately I still can’t trust Ventoy, so I’m forced to look elsewhere.
The hardware
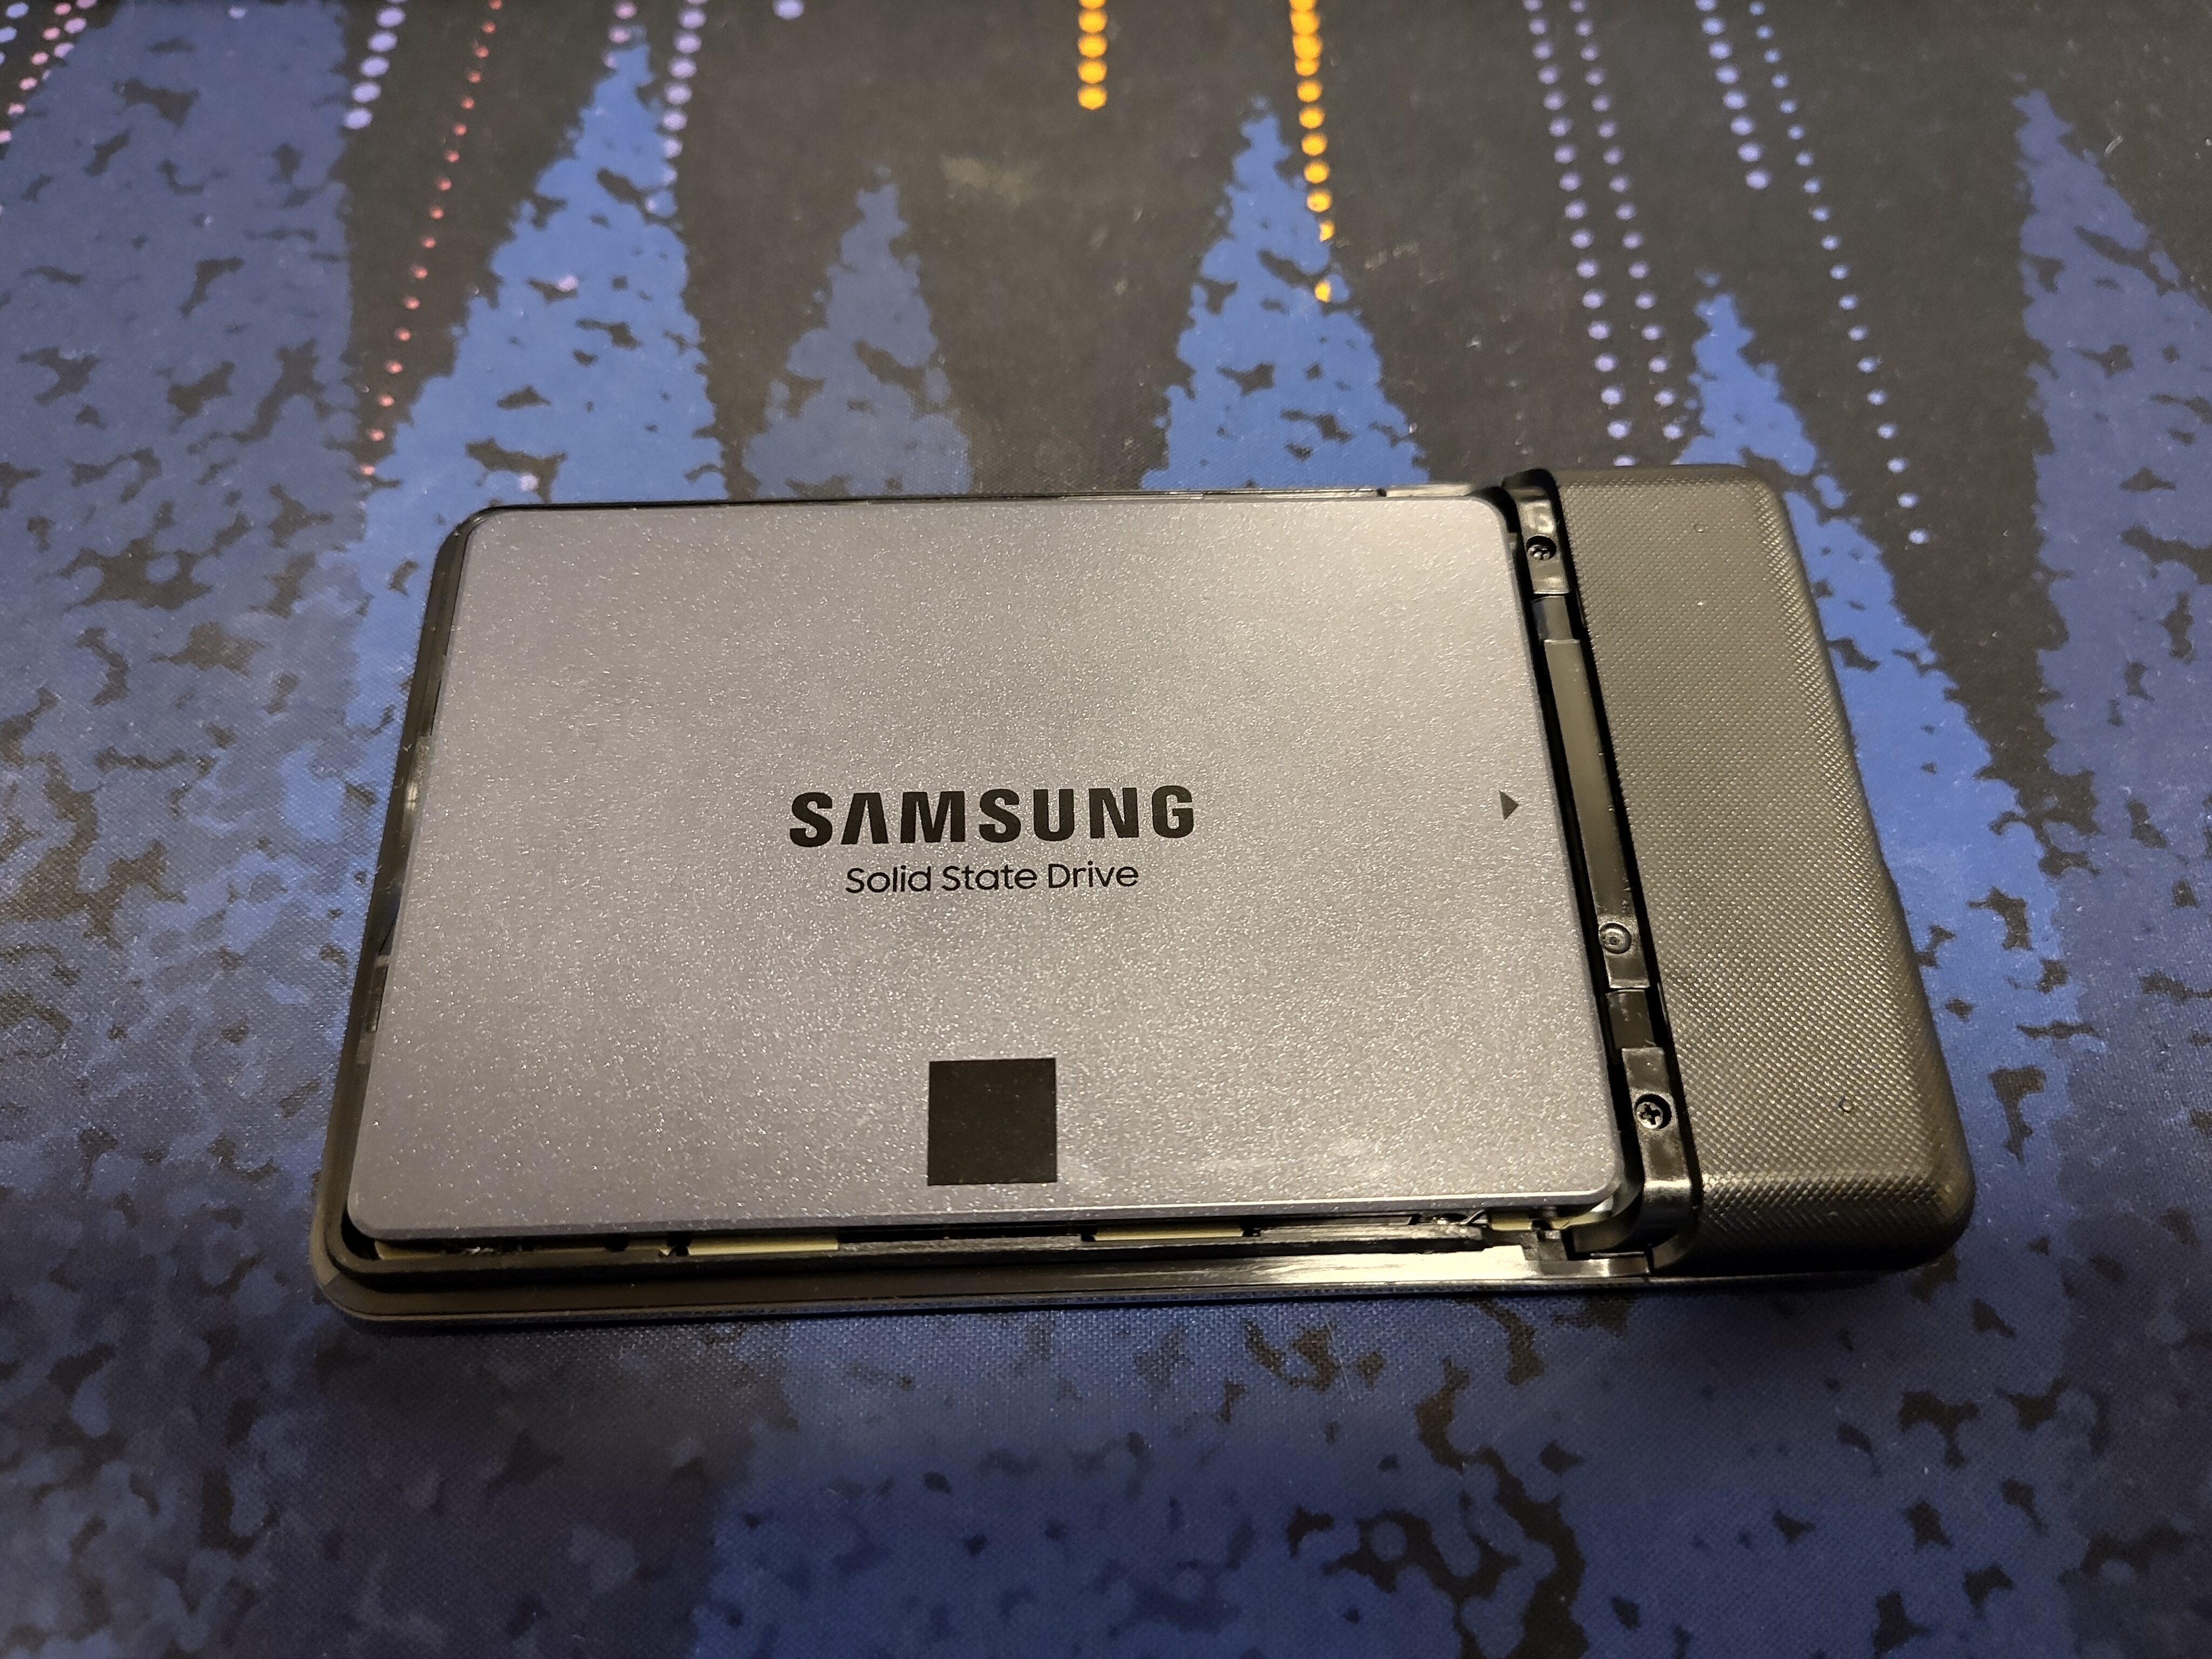
I decided to get the IODD ST400 for 122 EUR (about 124 USD) off of Amazon Germany, since it was for some reason cheaper than getting it from iodd.shop directly. SATA SSD-s are cheap and plentiful, so the ST400 made the most sense to me.

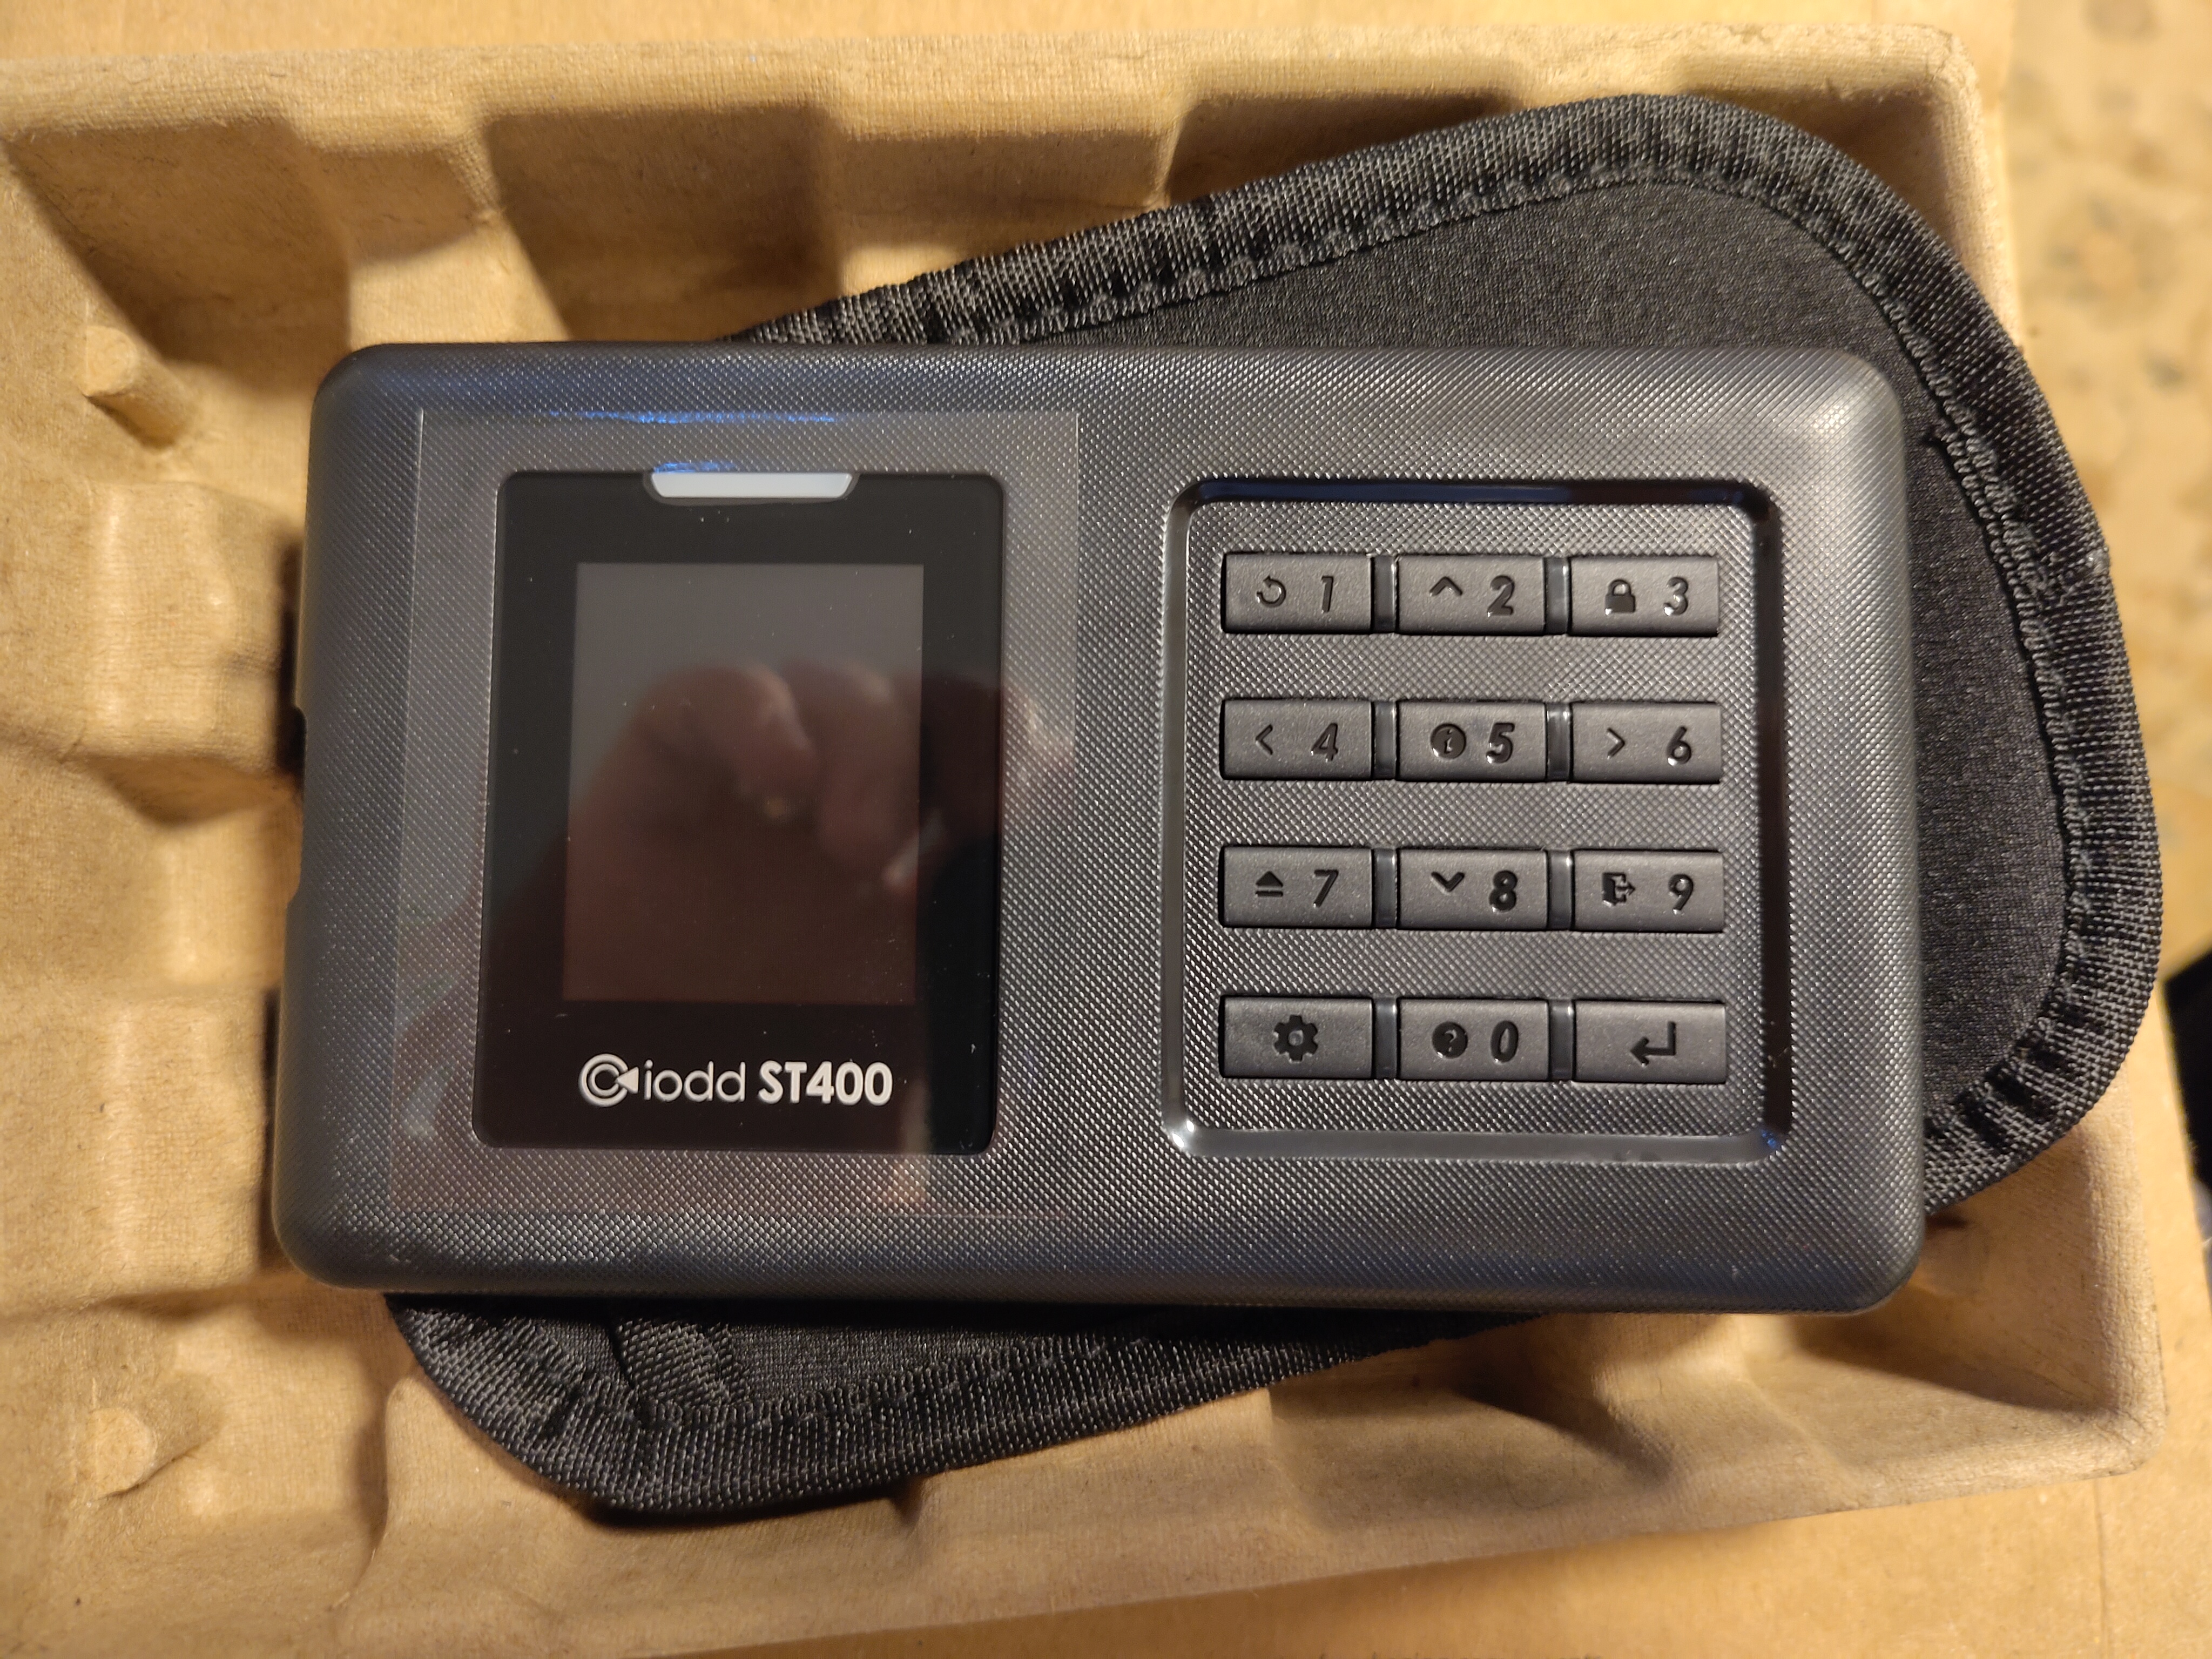
The device came with one USB cable, with type A and type C ends. The device itself has a USB type C port, which I like a lot.

The buttons are functional and clicky, but incredibly loud.
Setting it up
Before you get started with this device, I highly recommend glancing over the official documentation. The text is poorly translated in some parts, but overall it gets the job done.
Inserting the SSD was reasonably simple, it slotted in well and would not move around after assembling it. Getting the back cover off was tricky, but I’d rather have that than have to deal with a loose back cover that comes off when it shouldn’t.
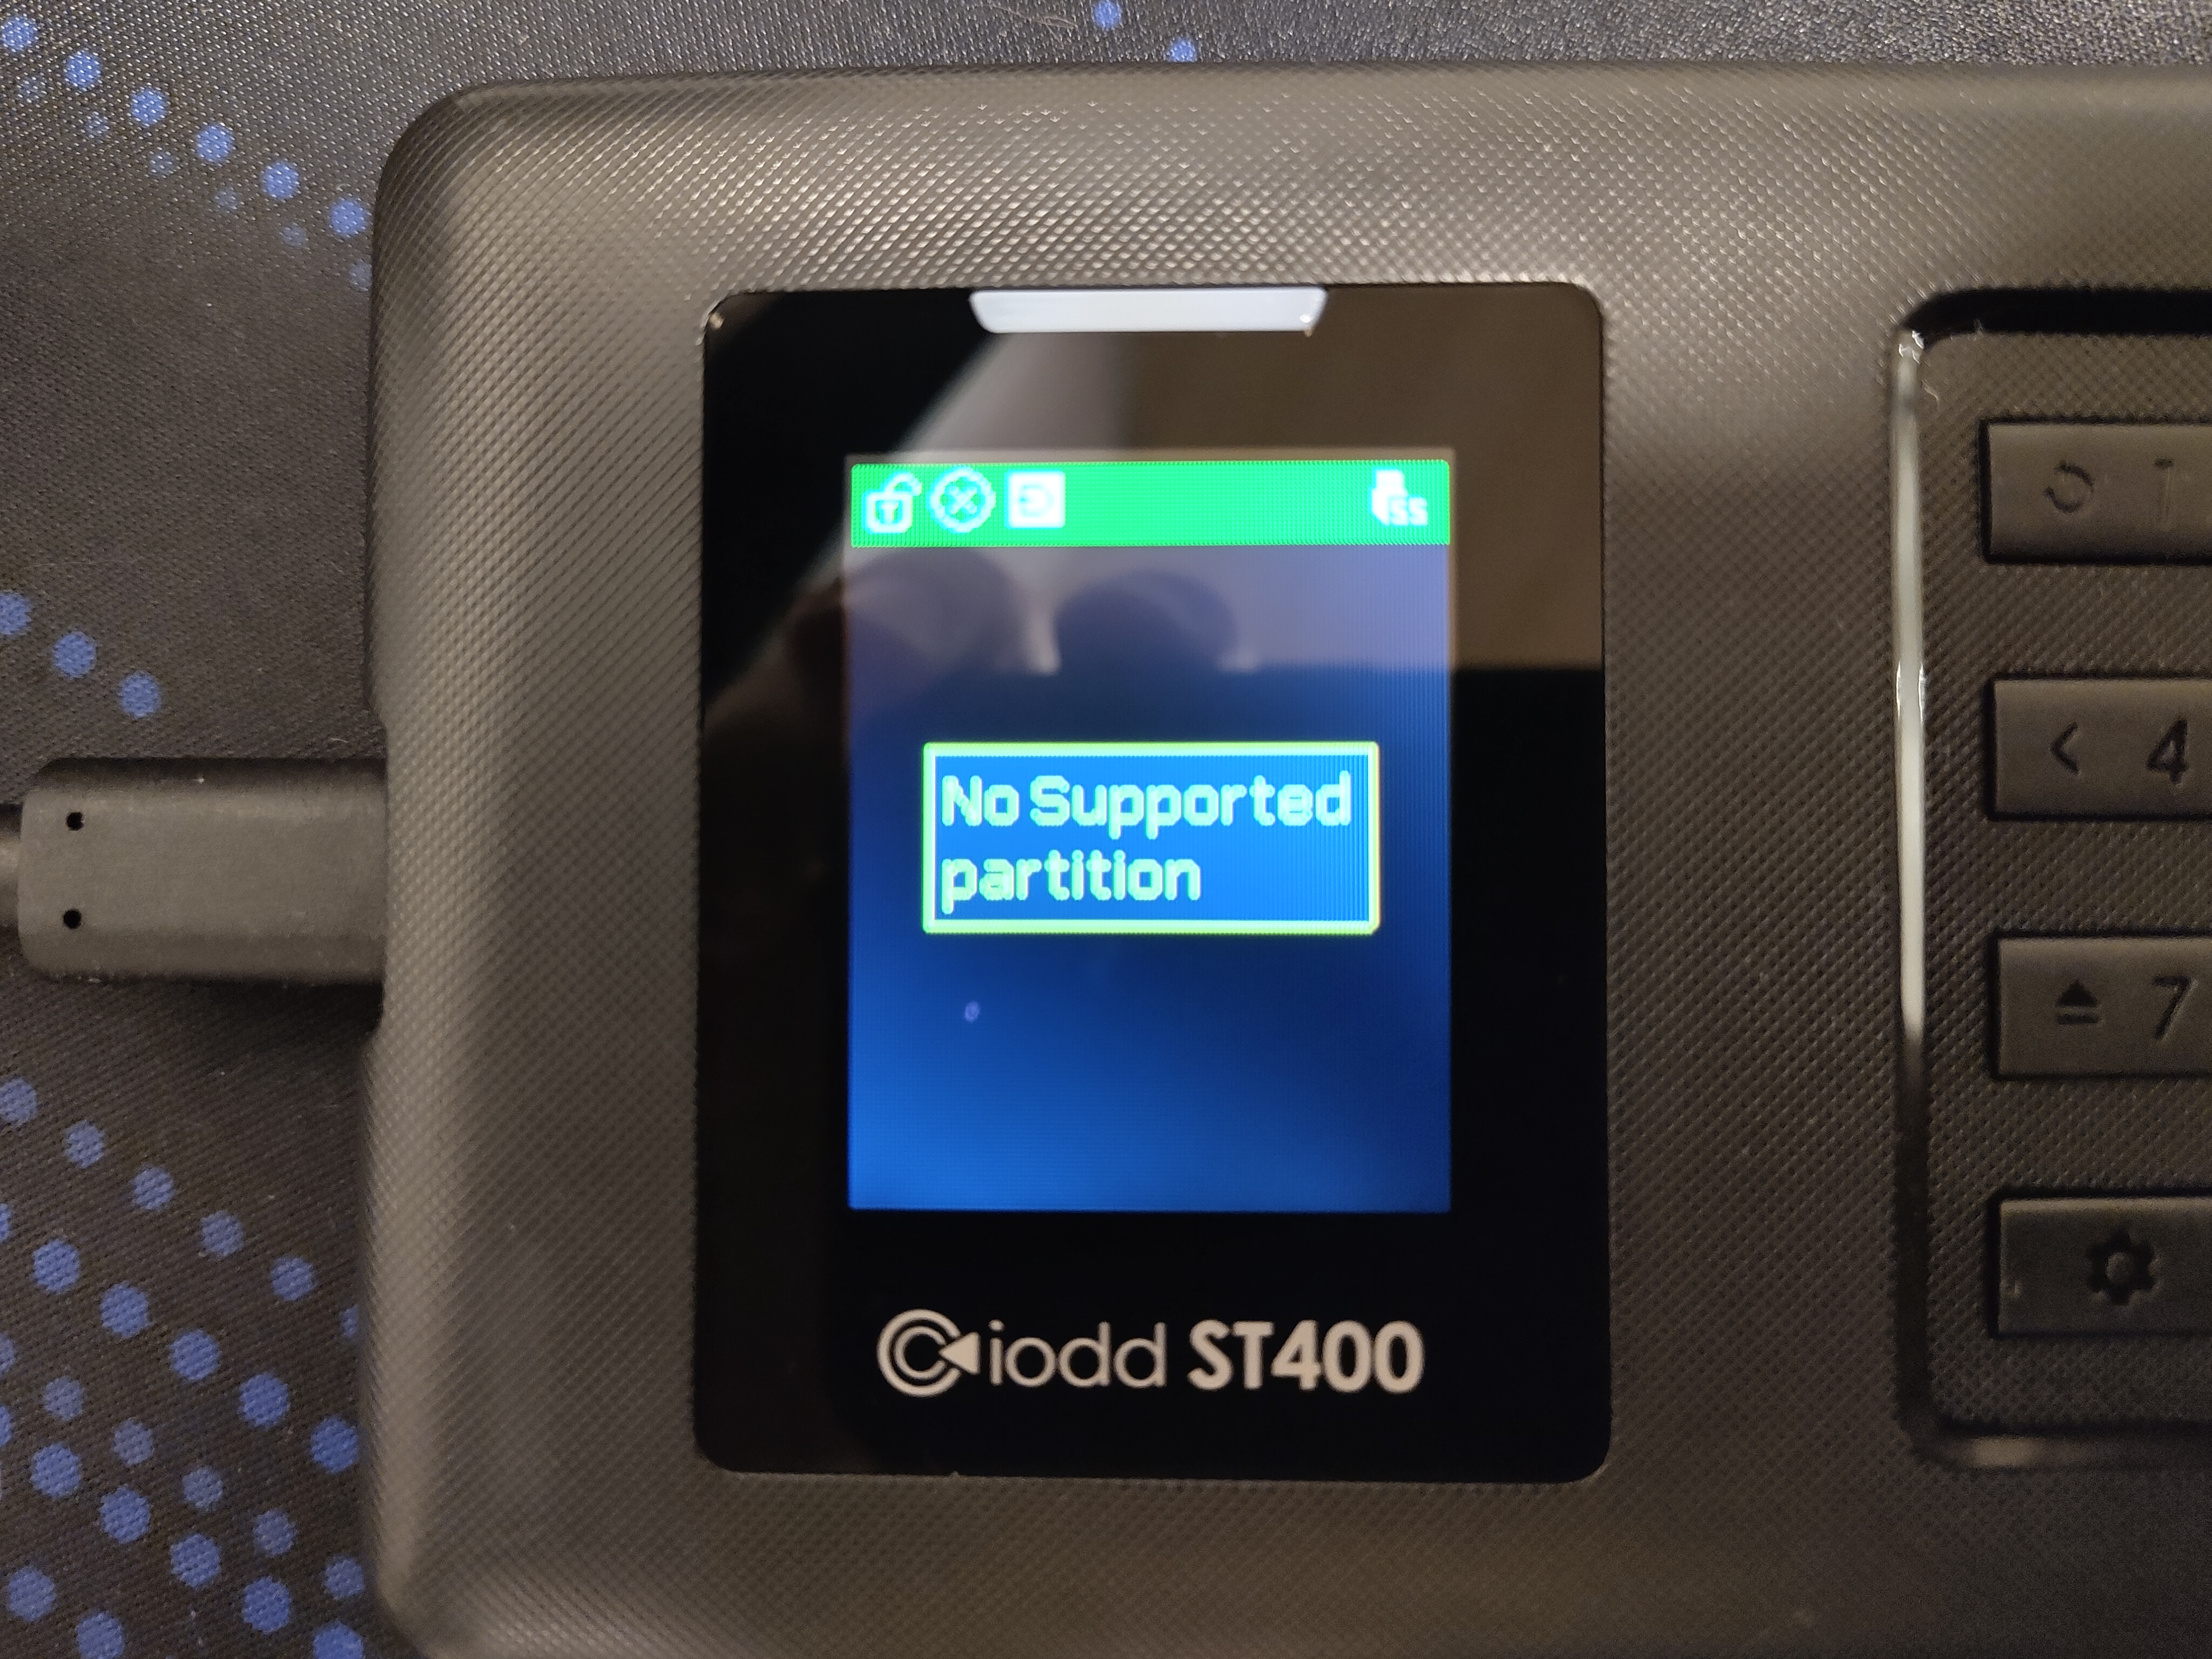
The most important step is the filesystem choice. You can choose between NTFS, FAT32 or exFAT. Due to the maximum file size limitation of 4GB on FAT32, you will probably want to go with either NTFS or exFAT.
Once you have a filesystem on the SSD, you can start copying various installers and tools on it and mount them!
The interface is unintuitive. I had to keep the manual close when testing mine, but eventually I figured out what I can and cannot do.
Device emulation
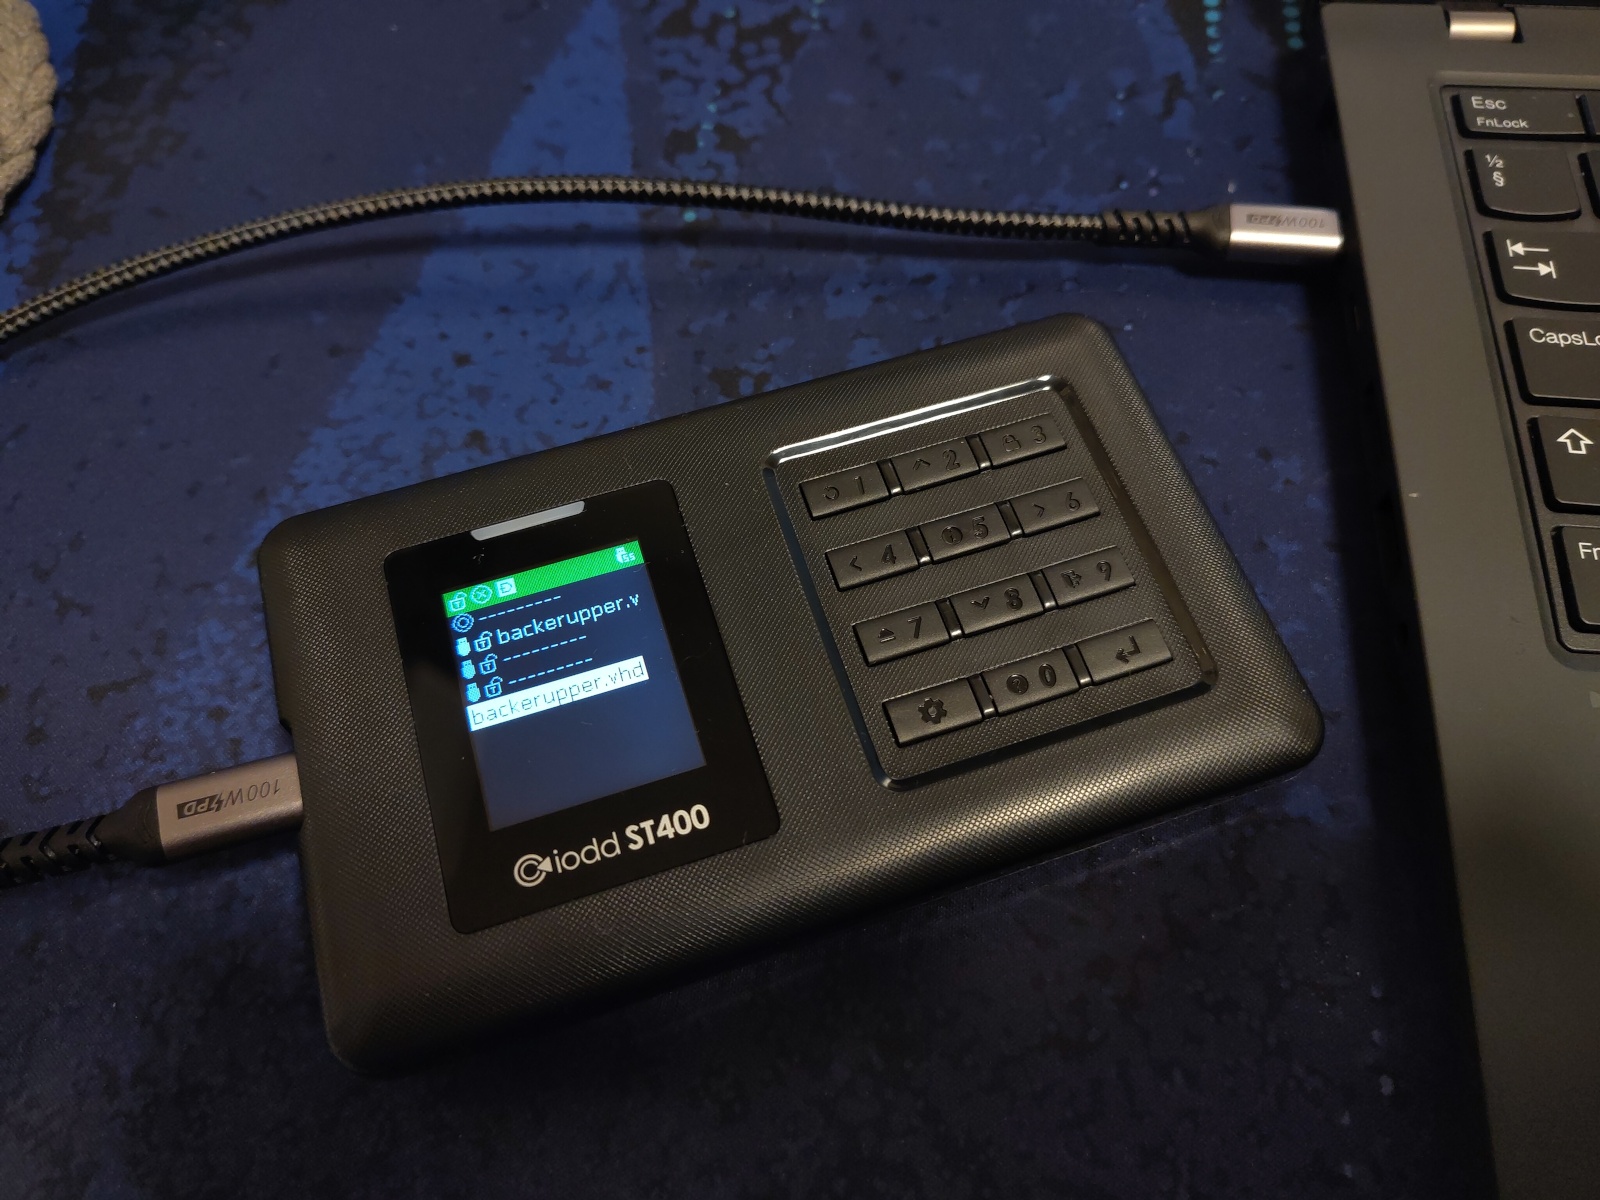
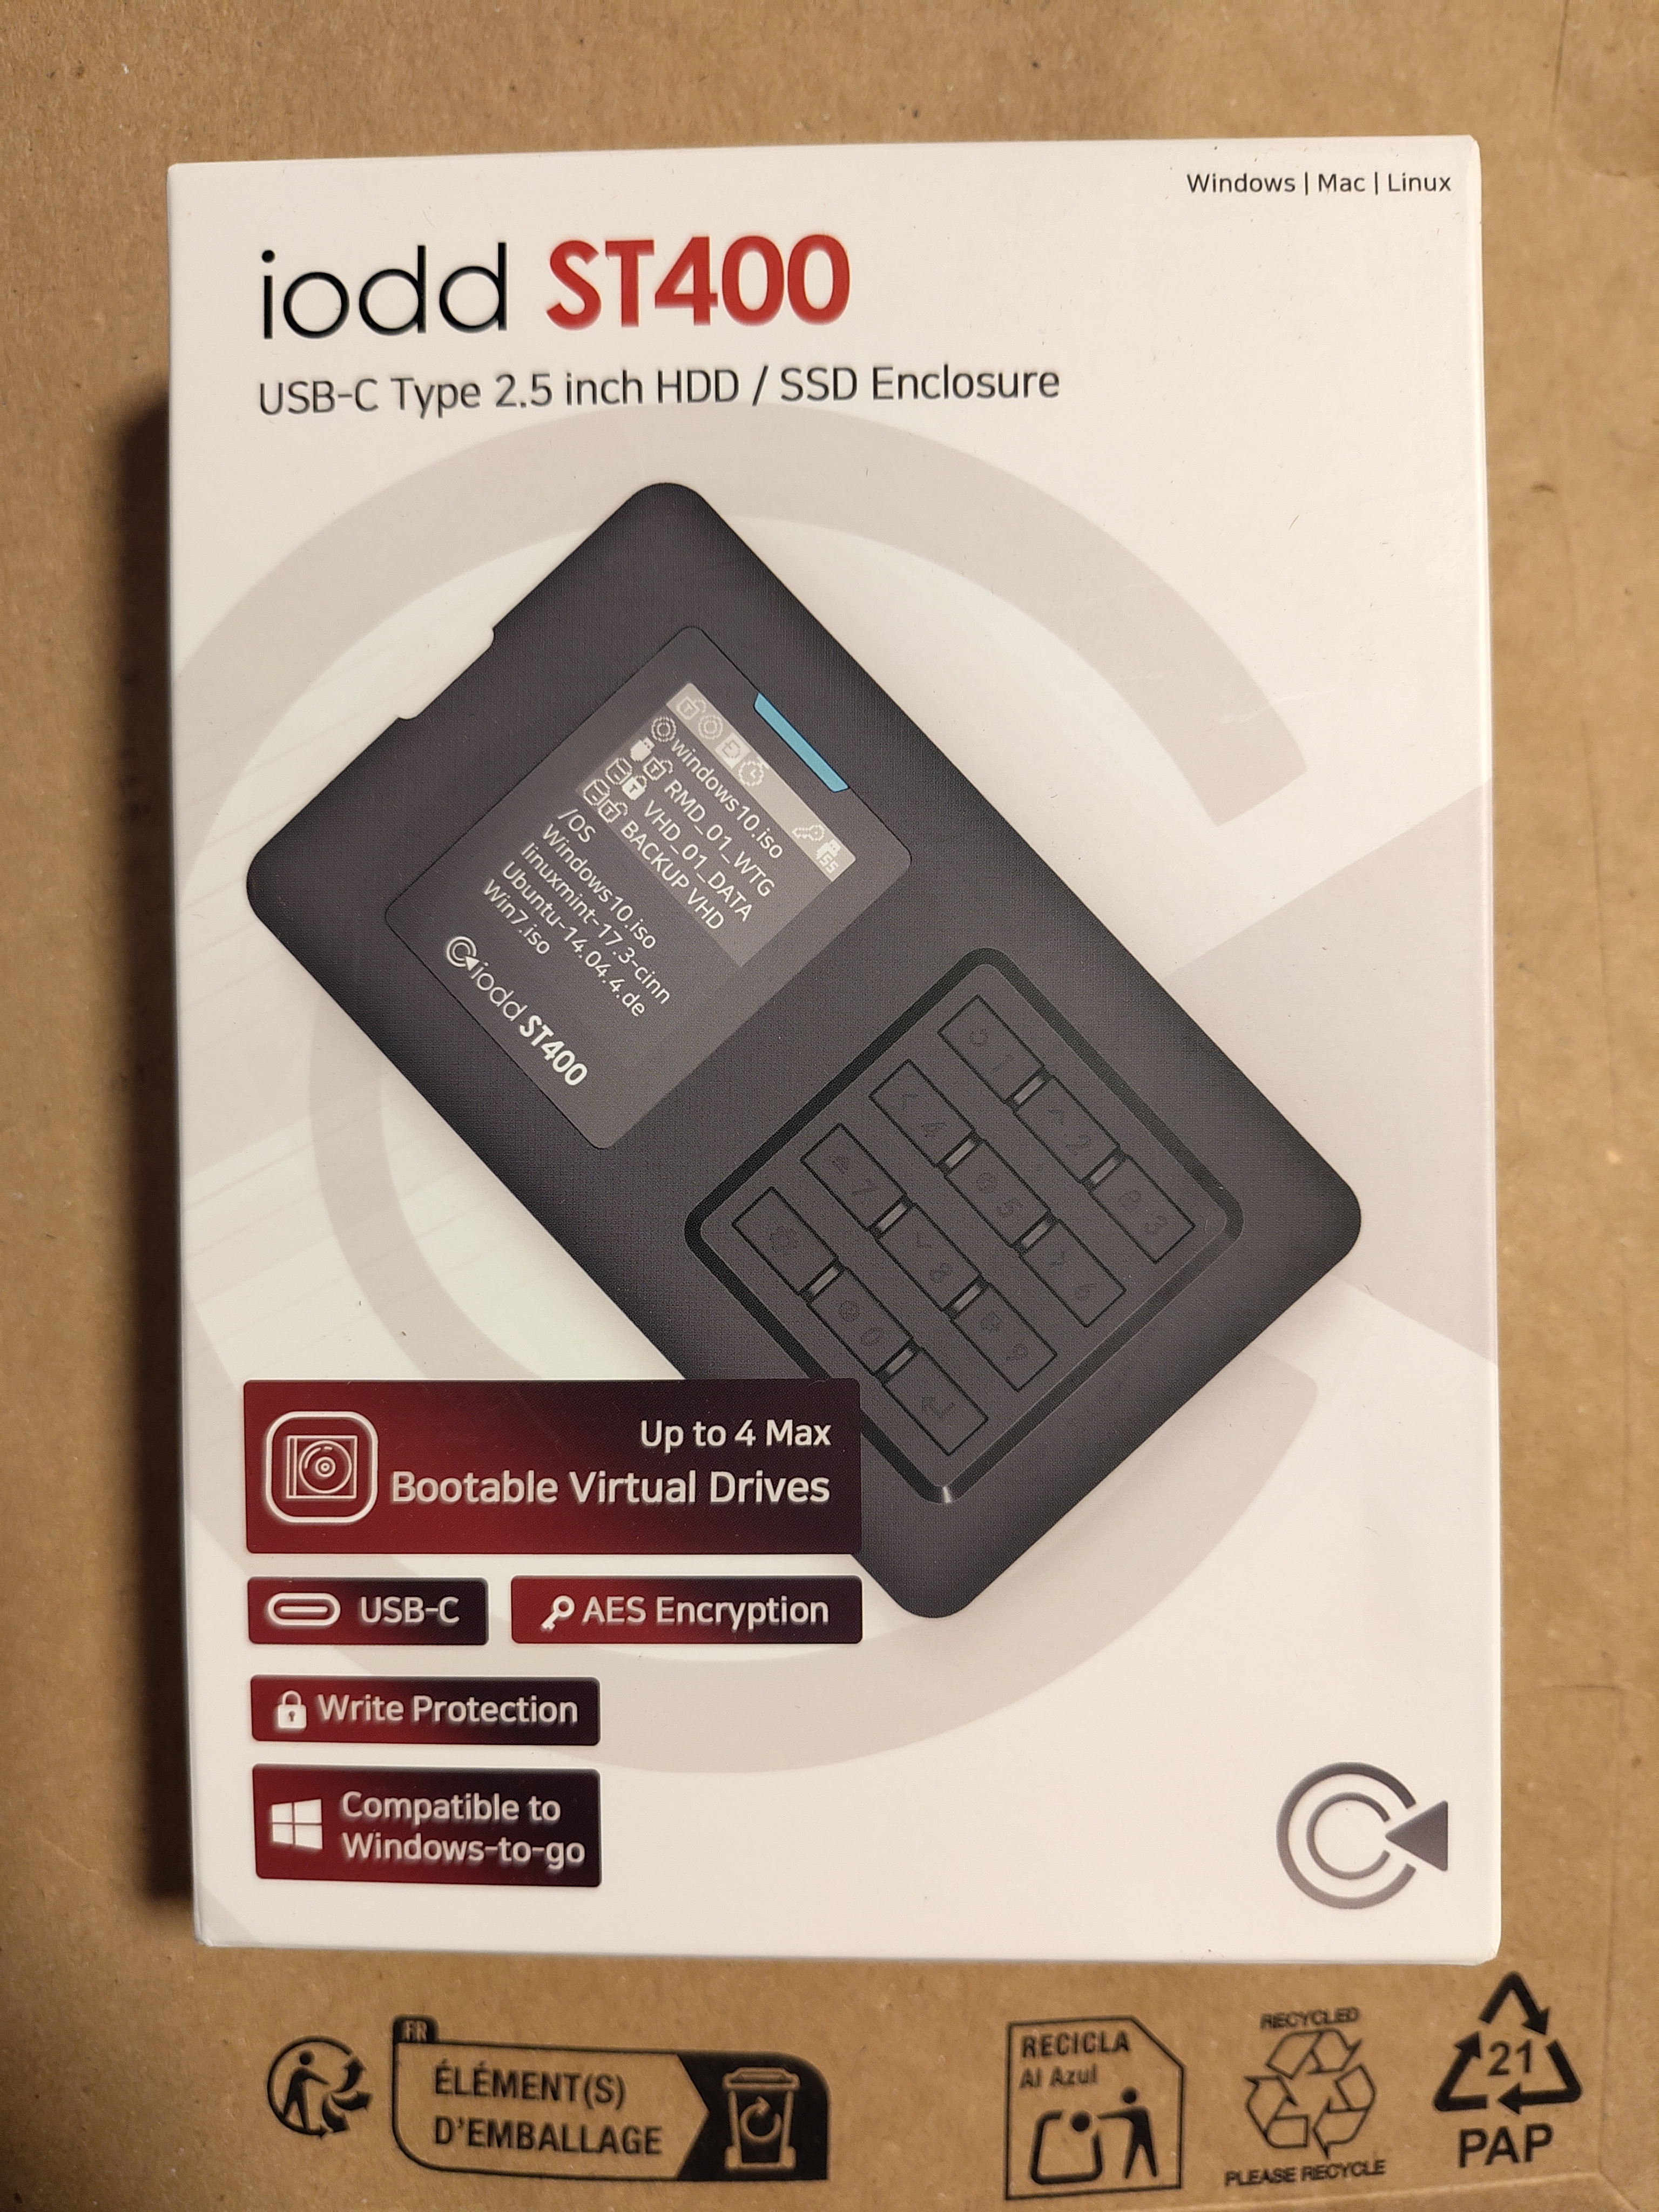
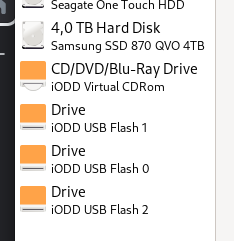
Whenever you connect the IODD device to a powered on PC, it will present itself as multiple devices:
- normal hard drive: the whole IODD filesystem is visible here, and you can also store other files and backups as well if you want to
- optical media drive: this is where your installation media (ISO files) will end up, read only
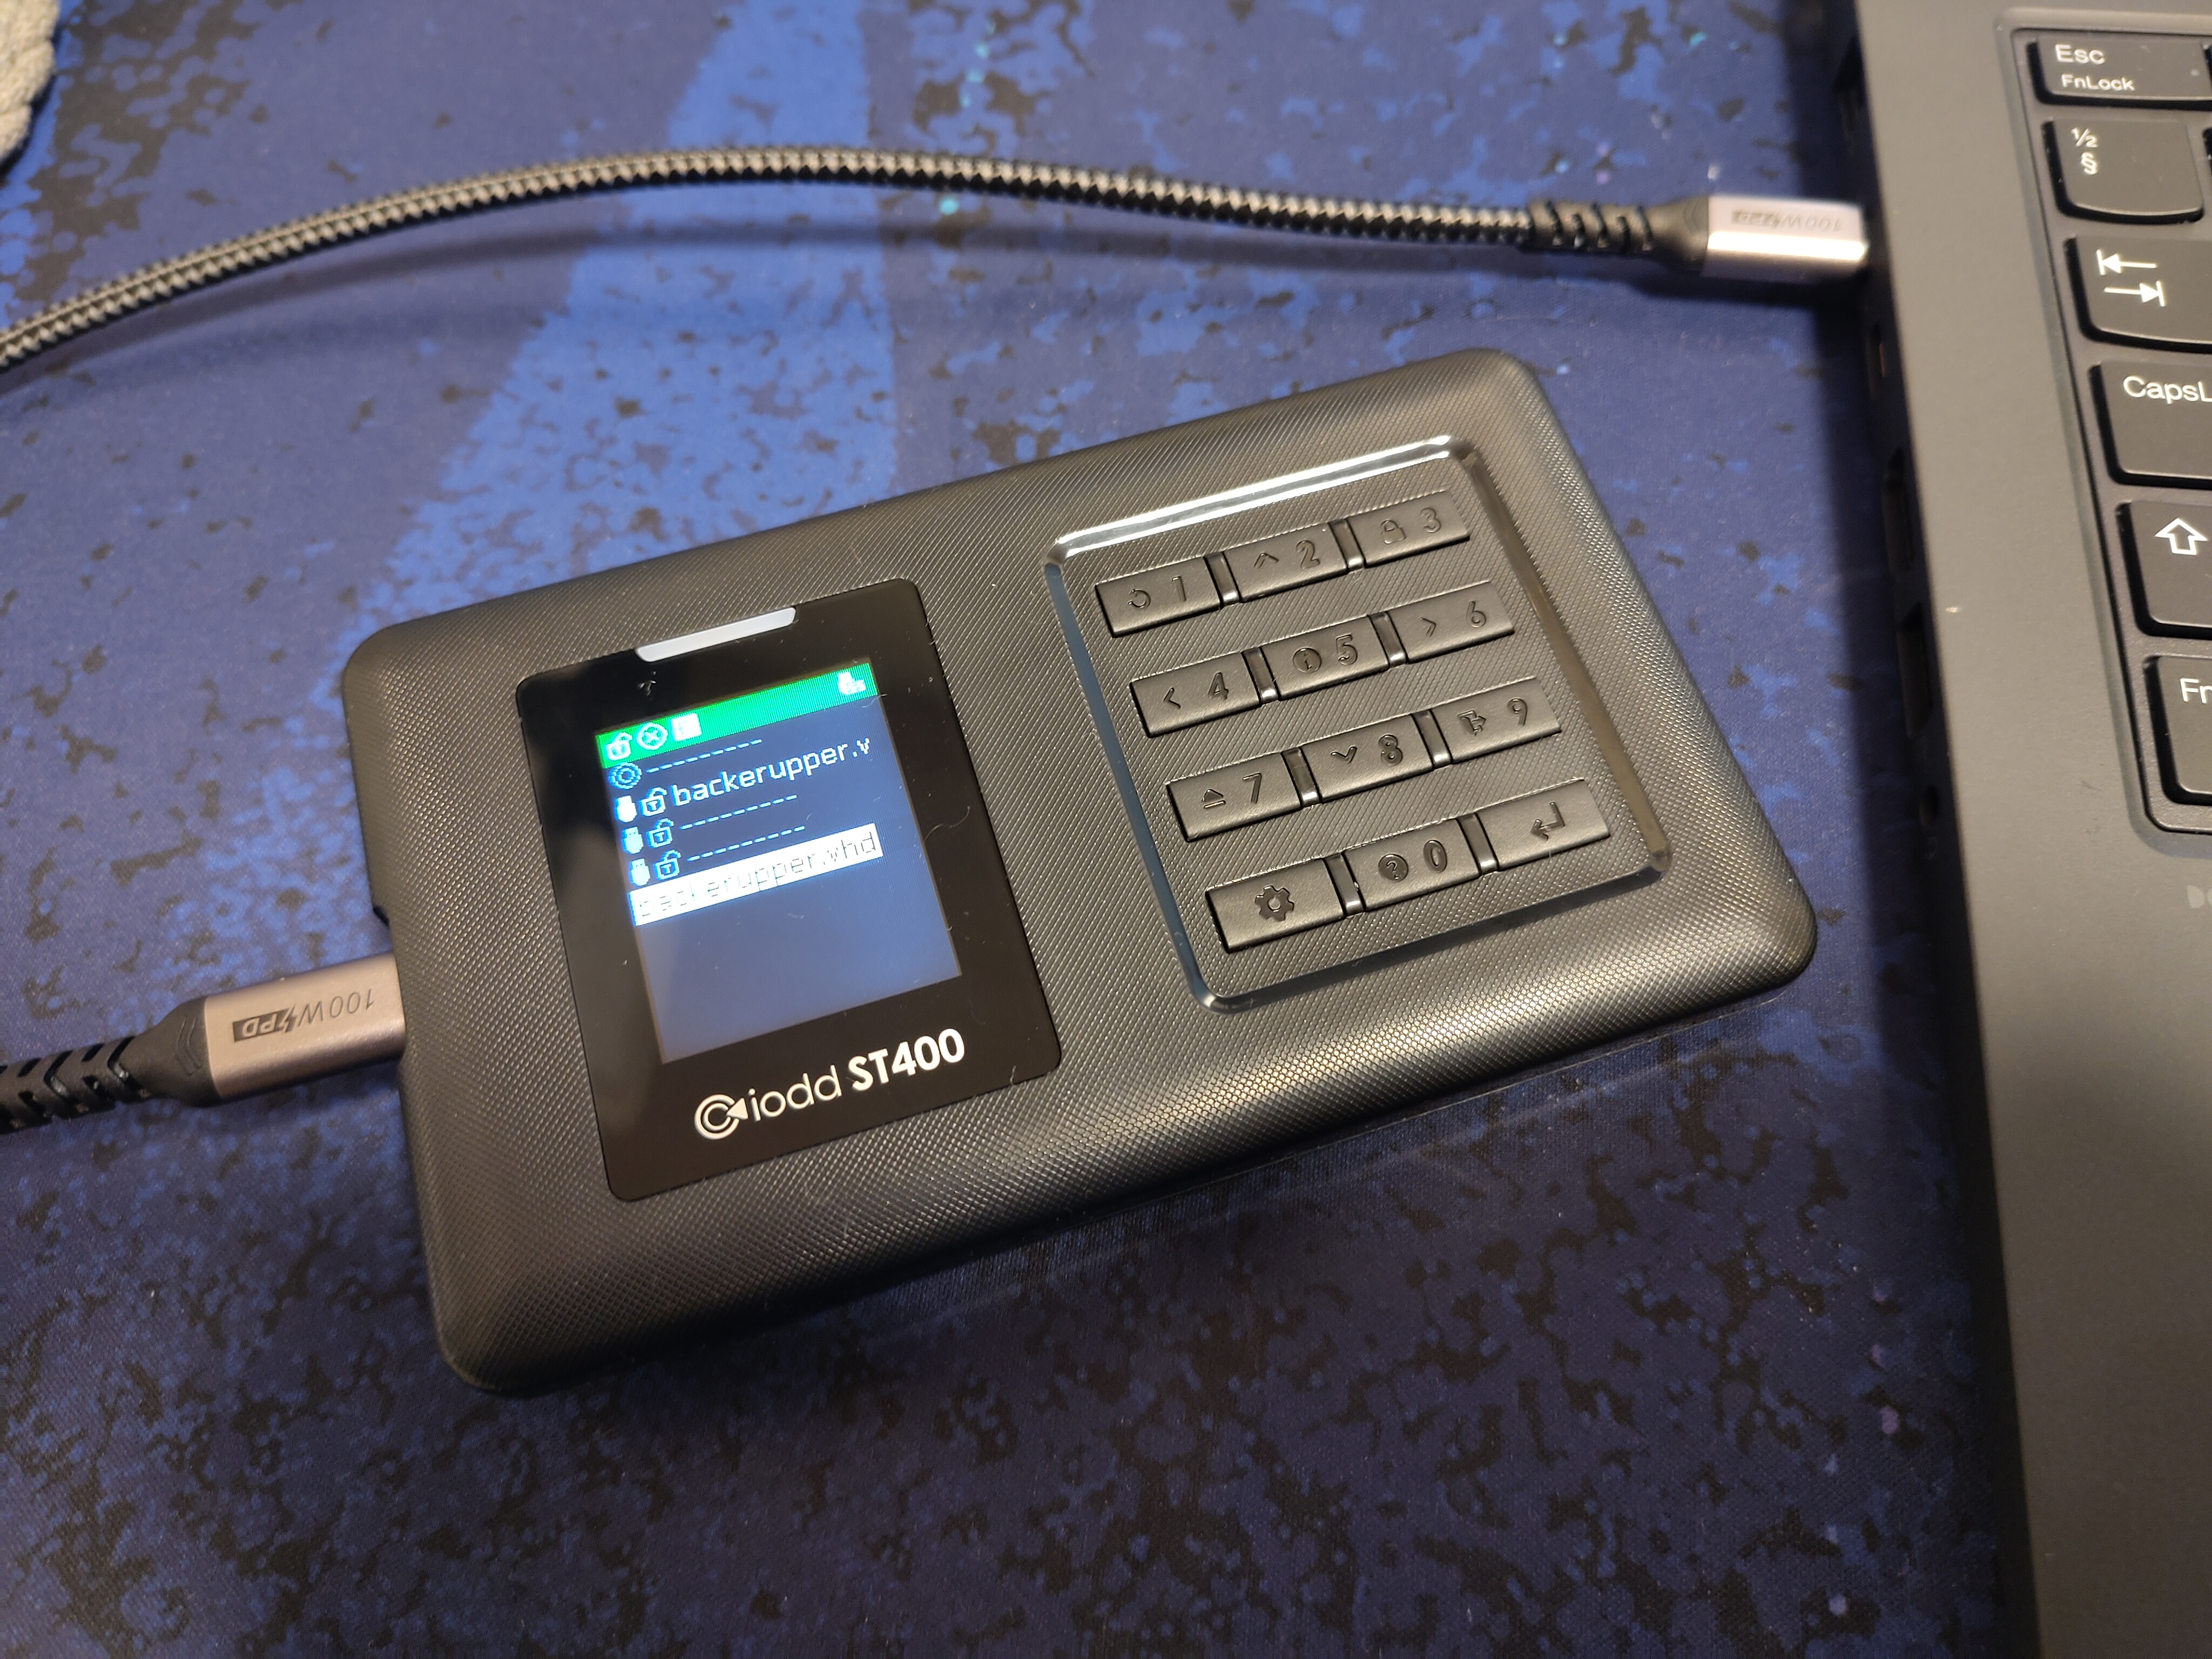
- virtual drives (up to 3 at a time): VHD files that represent virtual hard drives, but are seen as actual storage devices on the PC
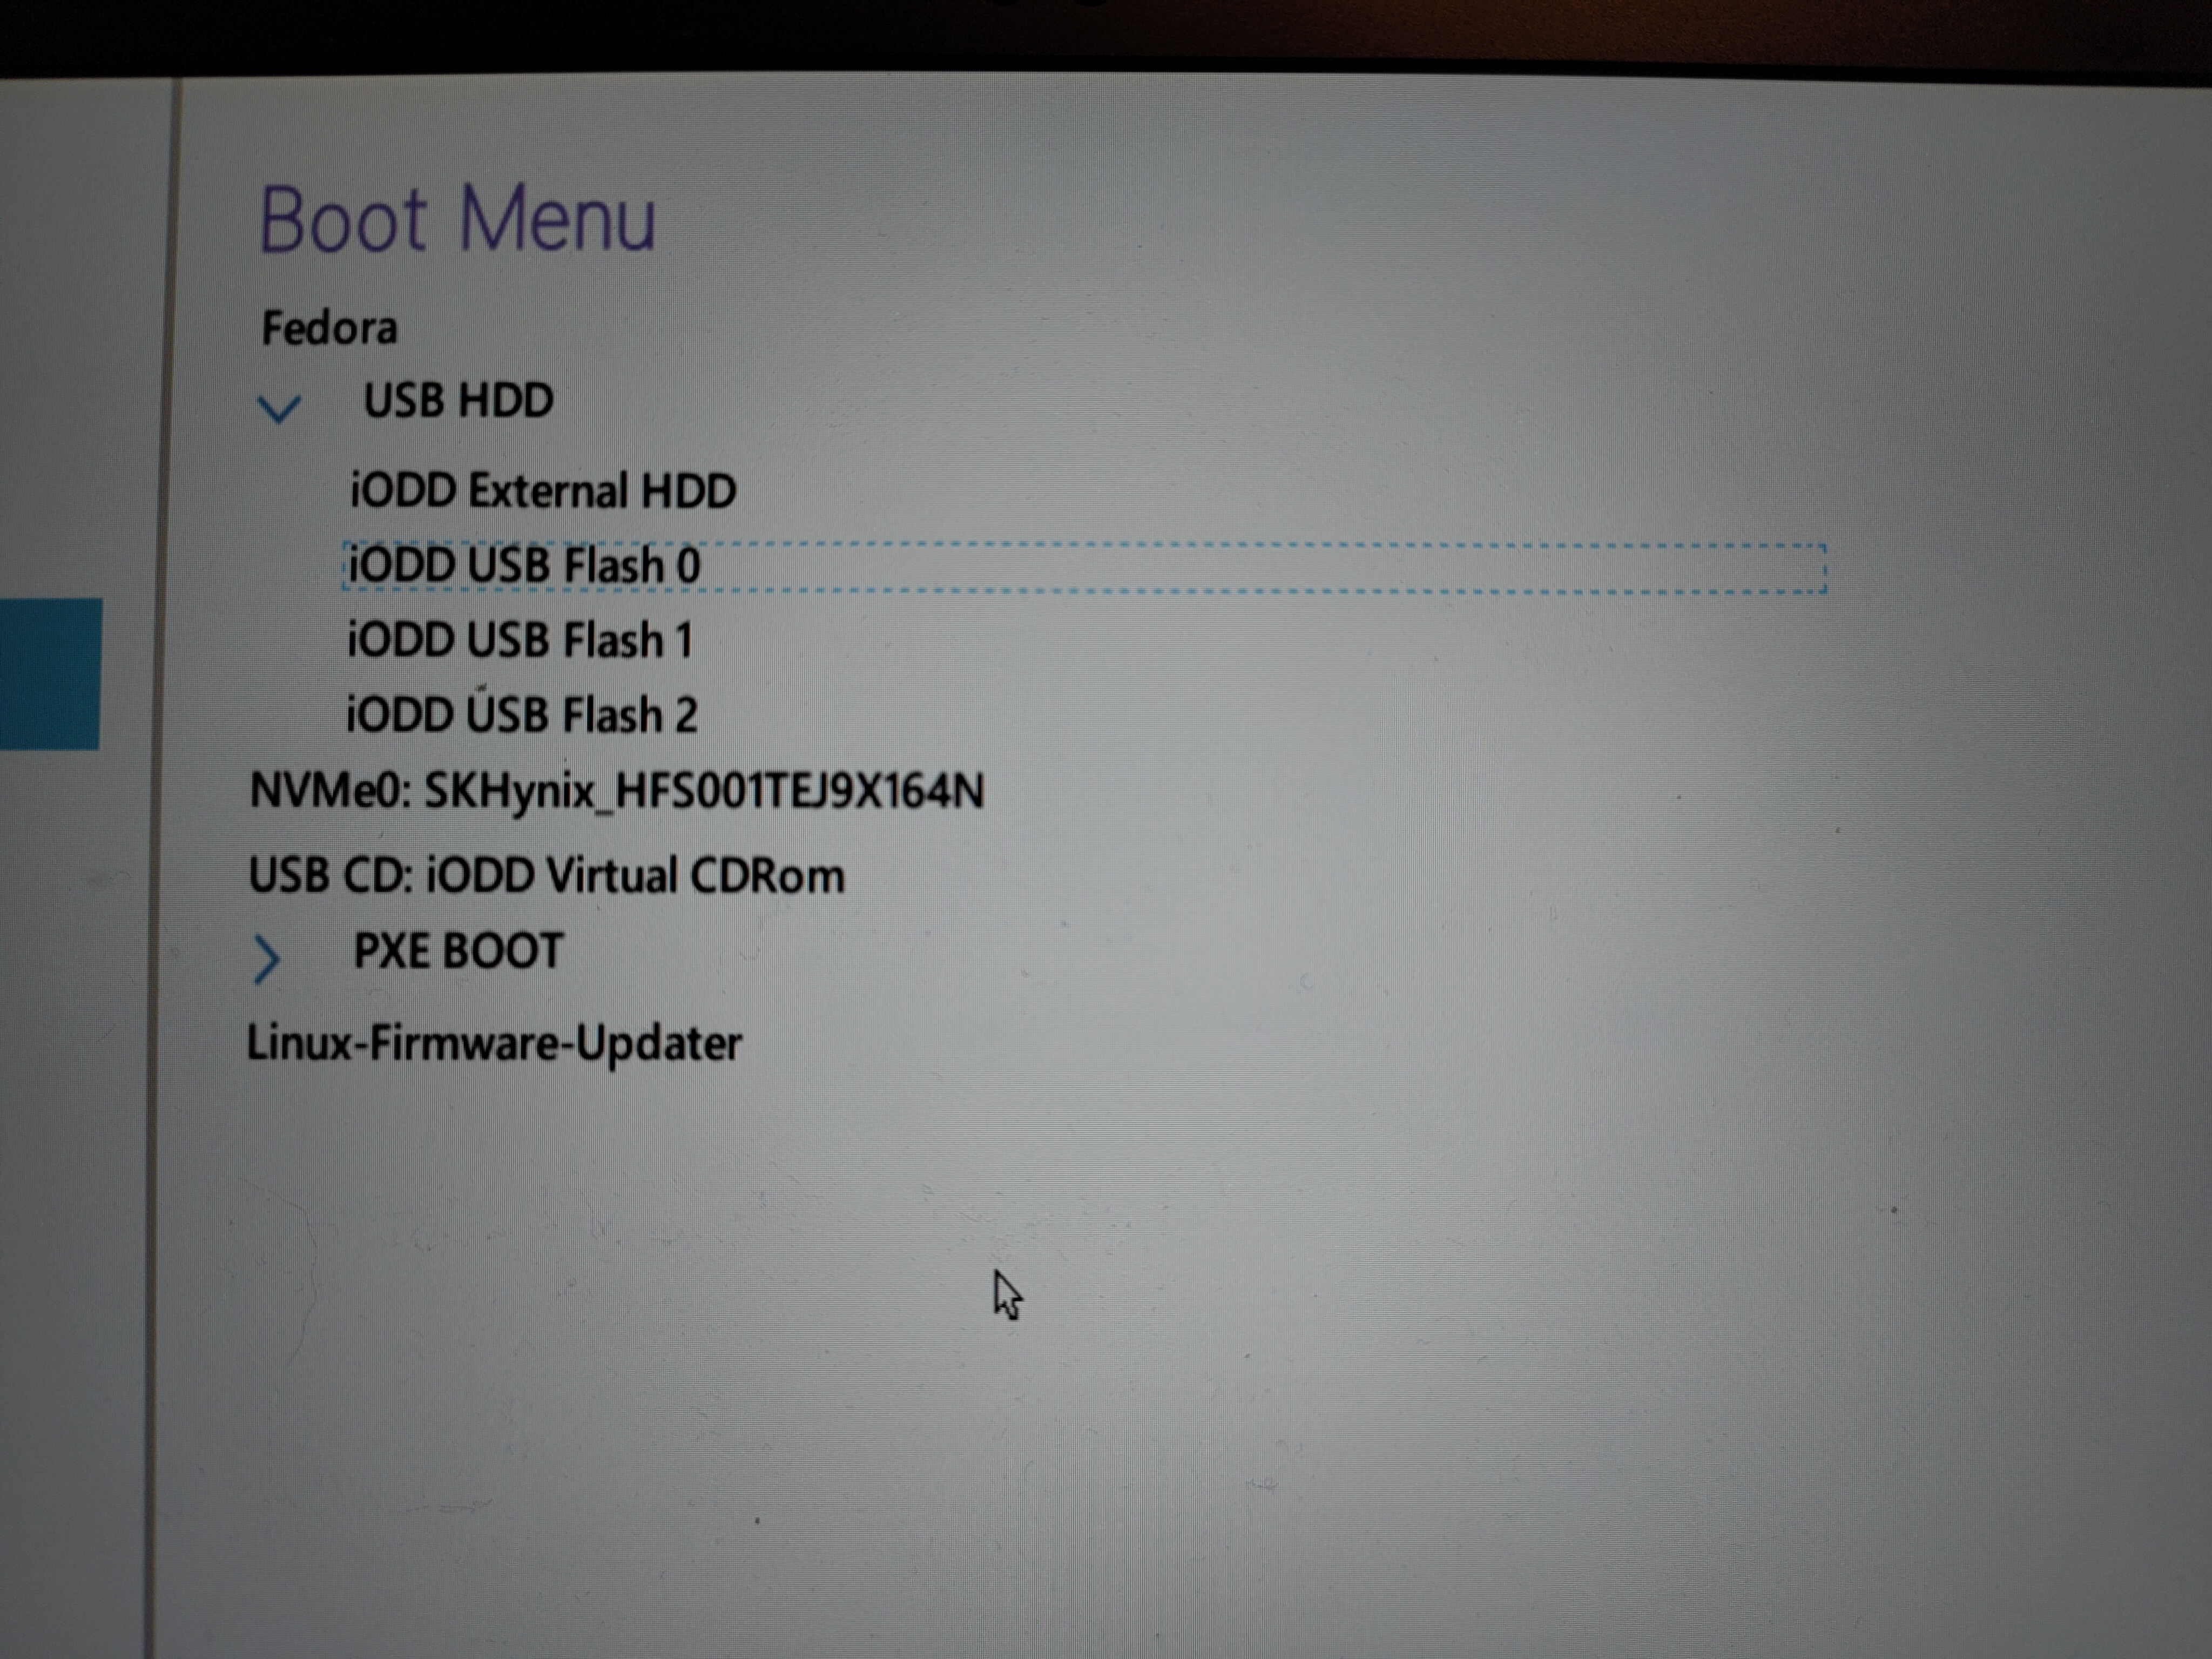
This combination of devices is incredibly handy. For example, you can boot an actual Fedora Linux installation as one of the virtual drives, and make a backup of the files on the PC right to the IODD storage itself.
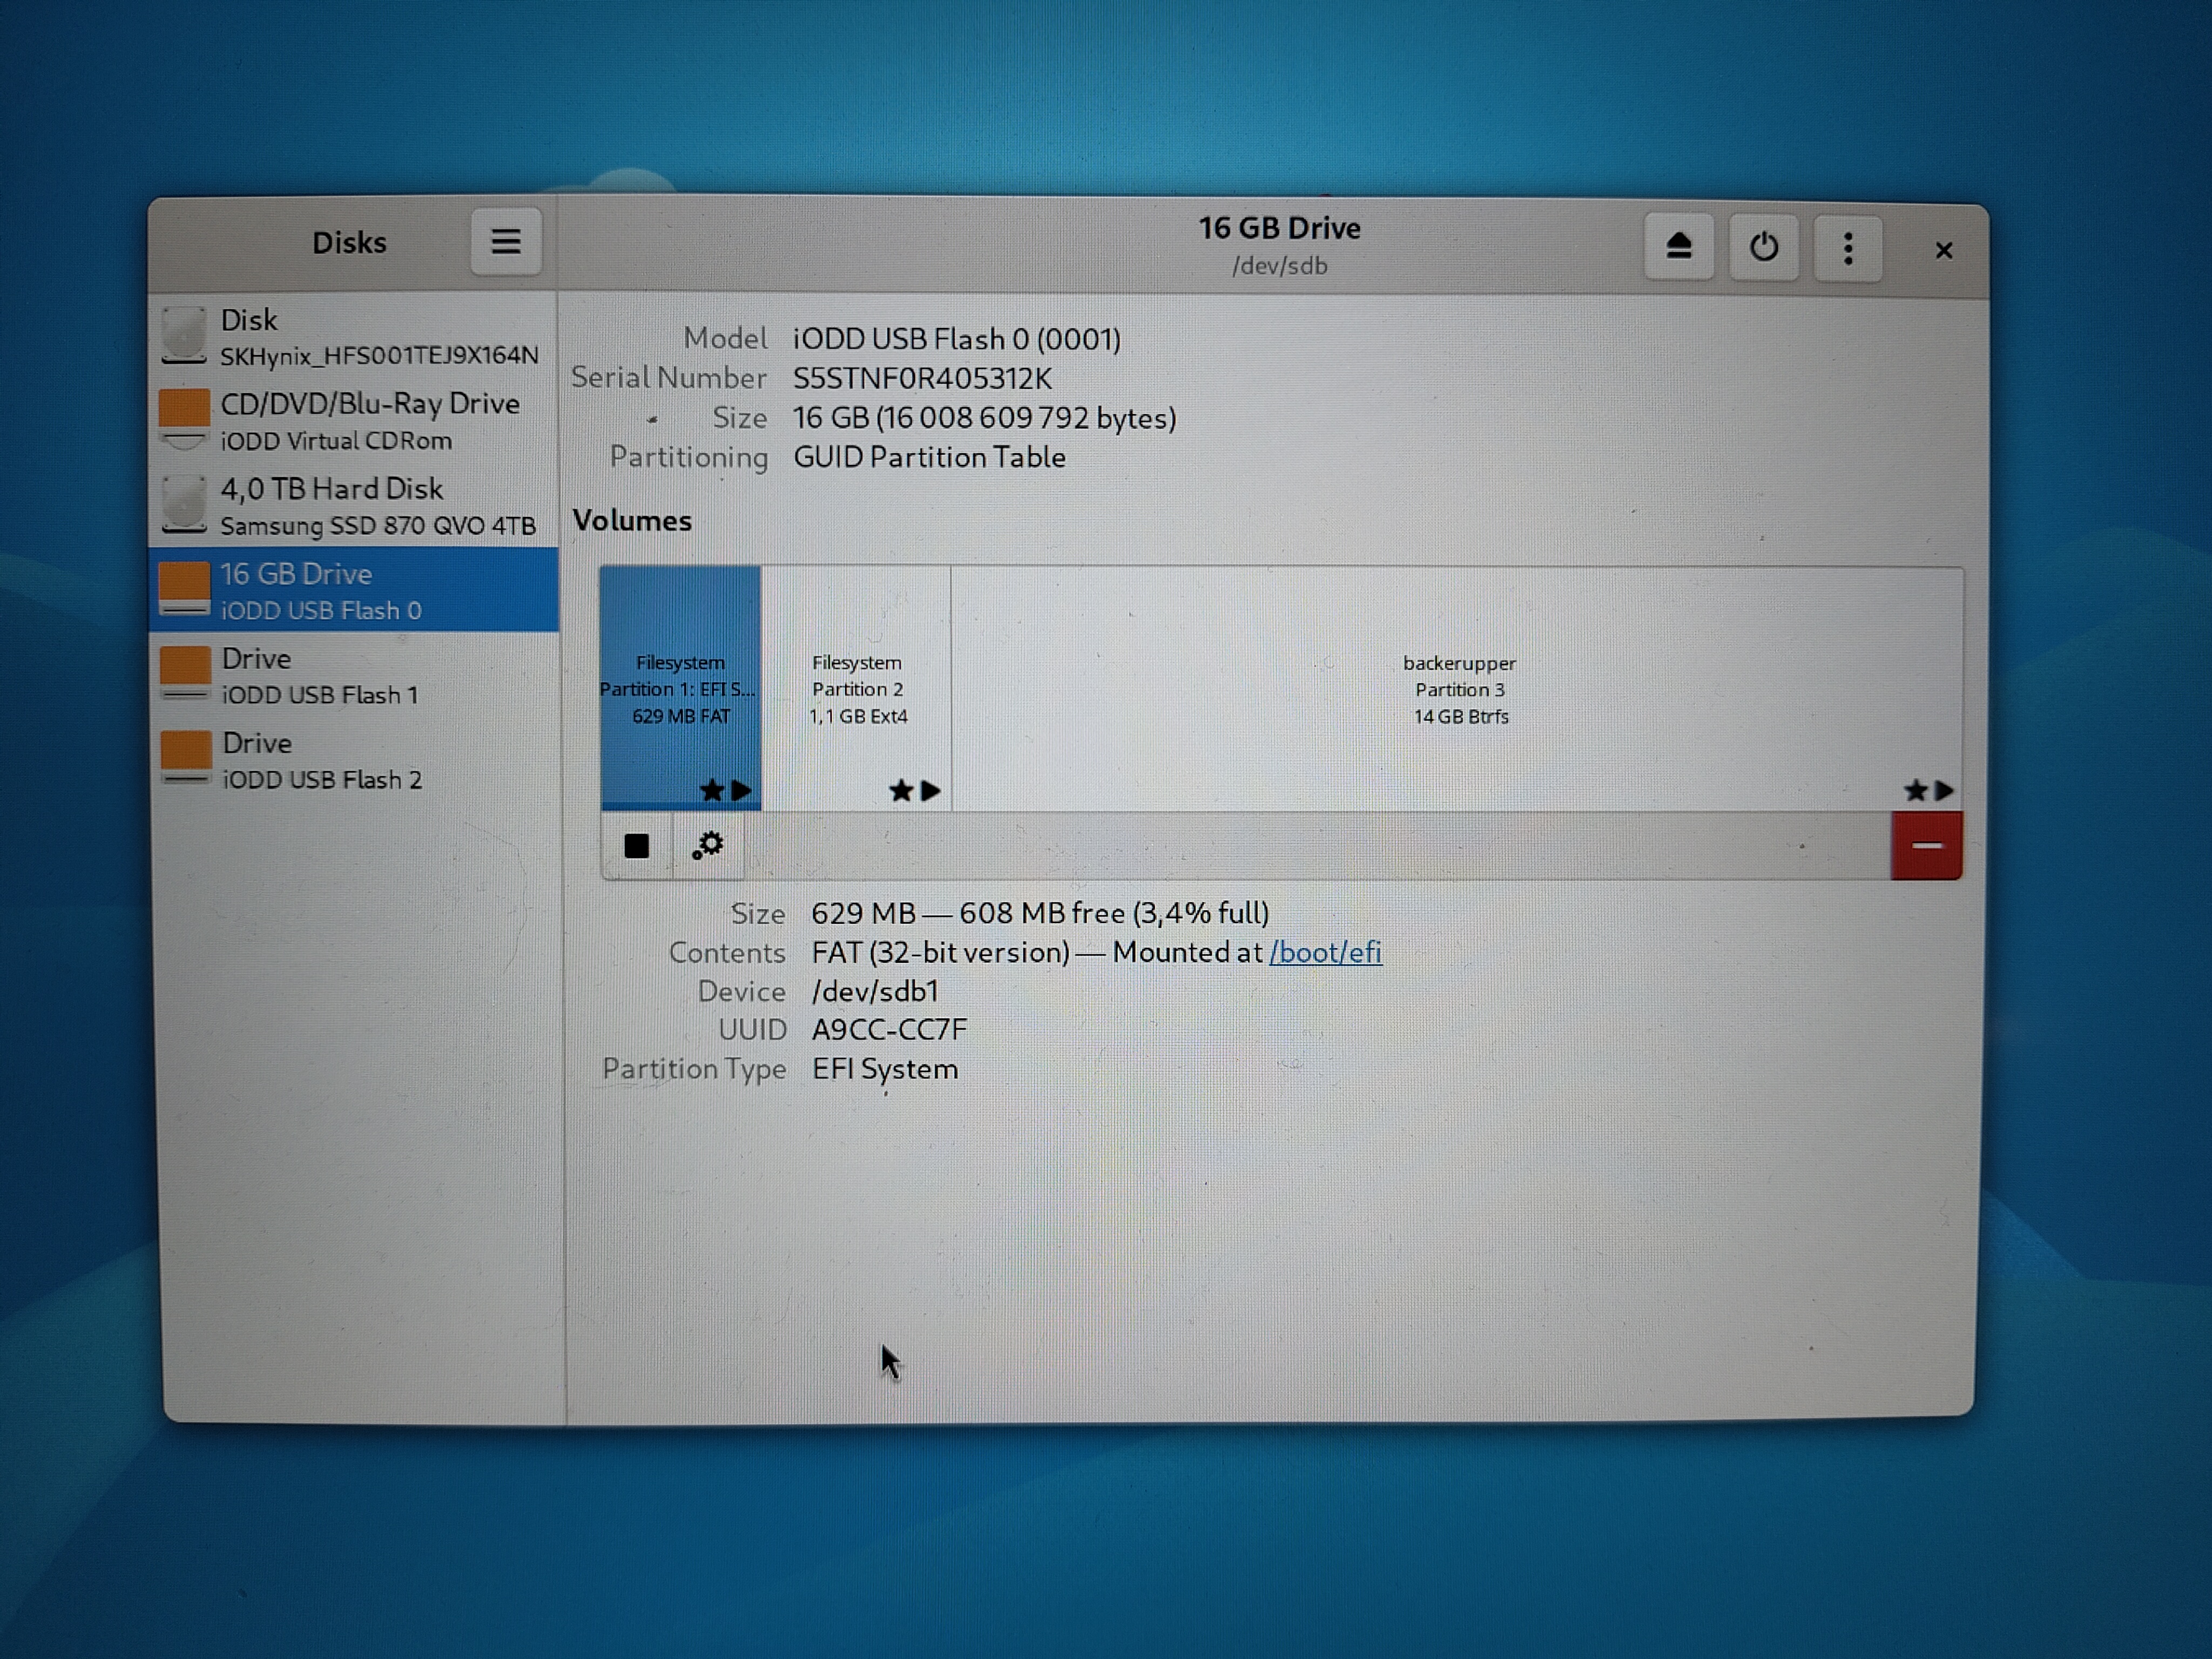
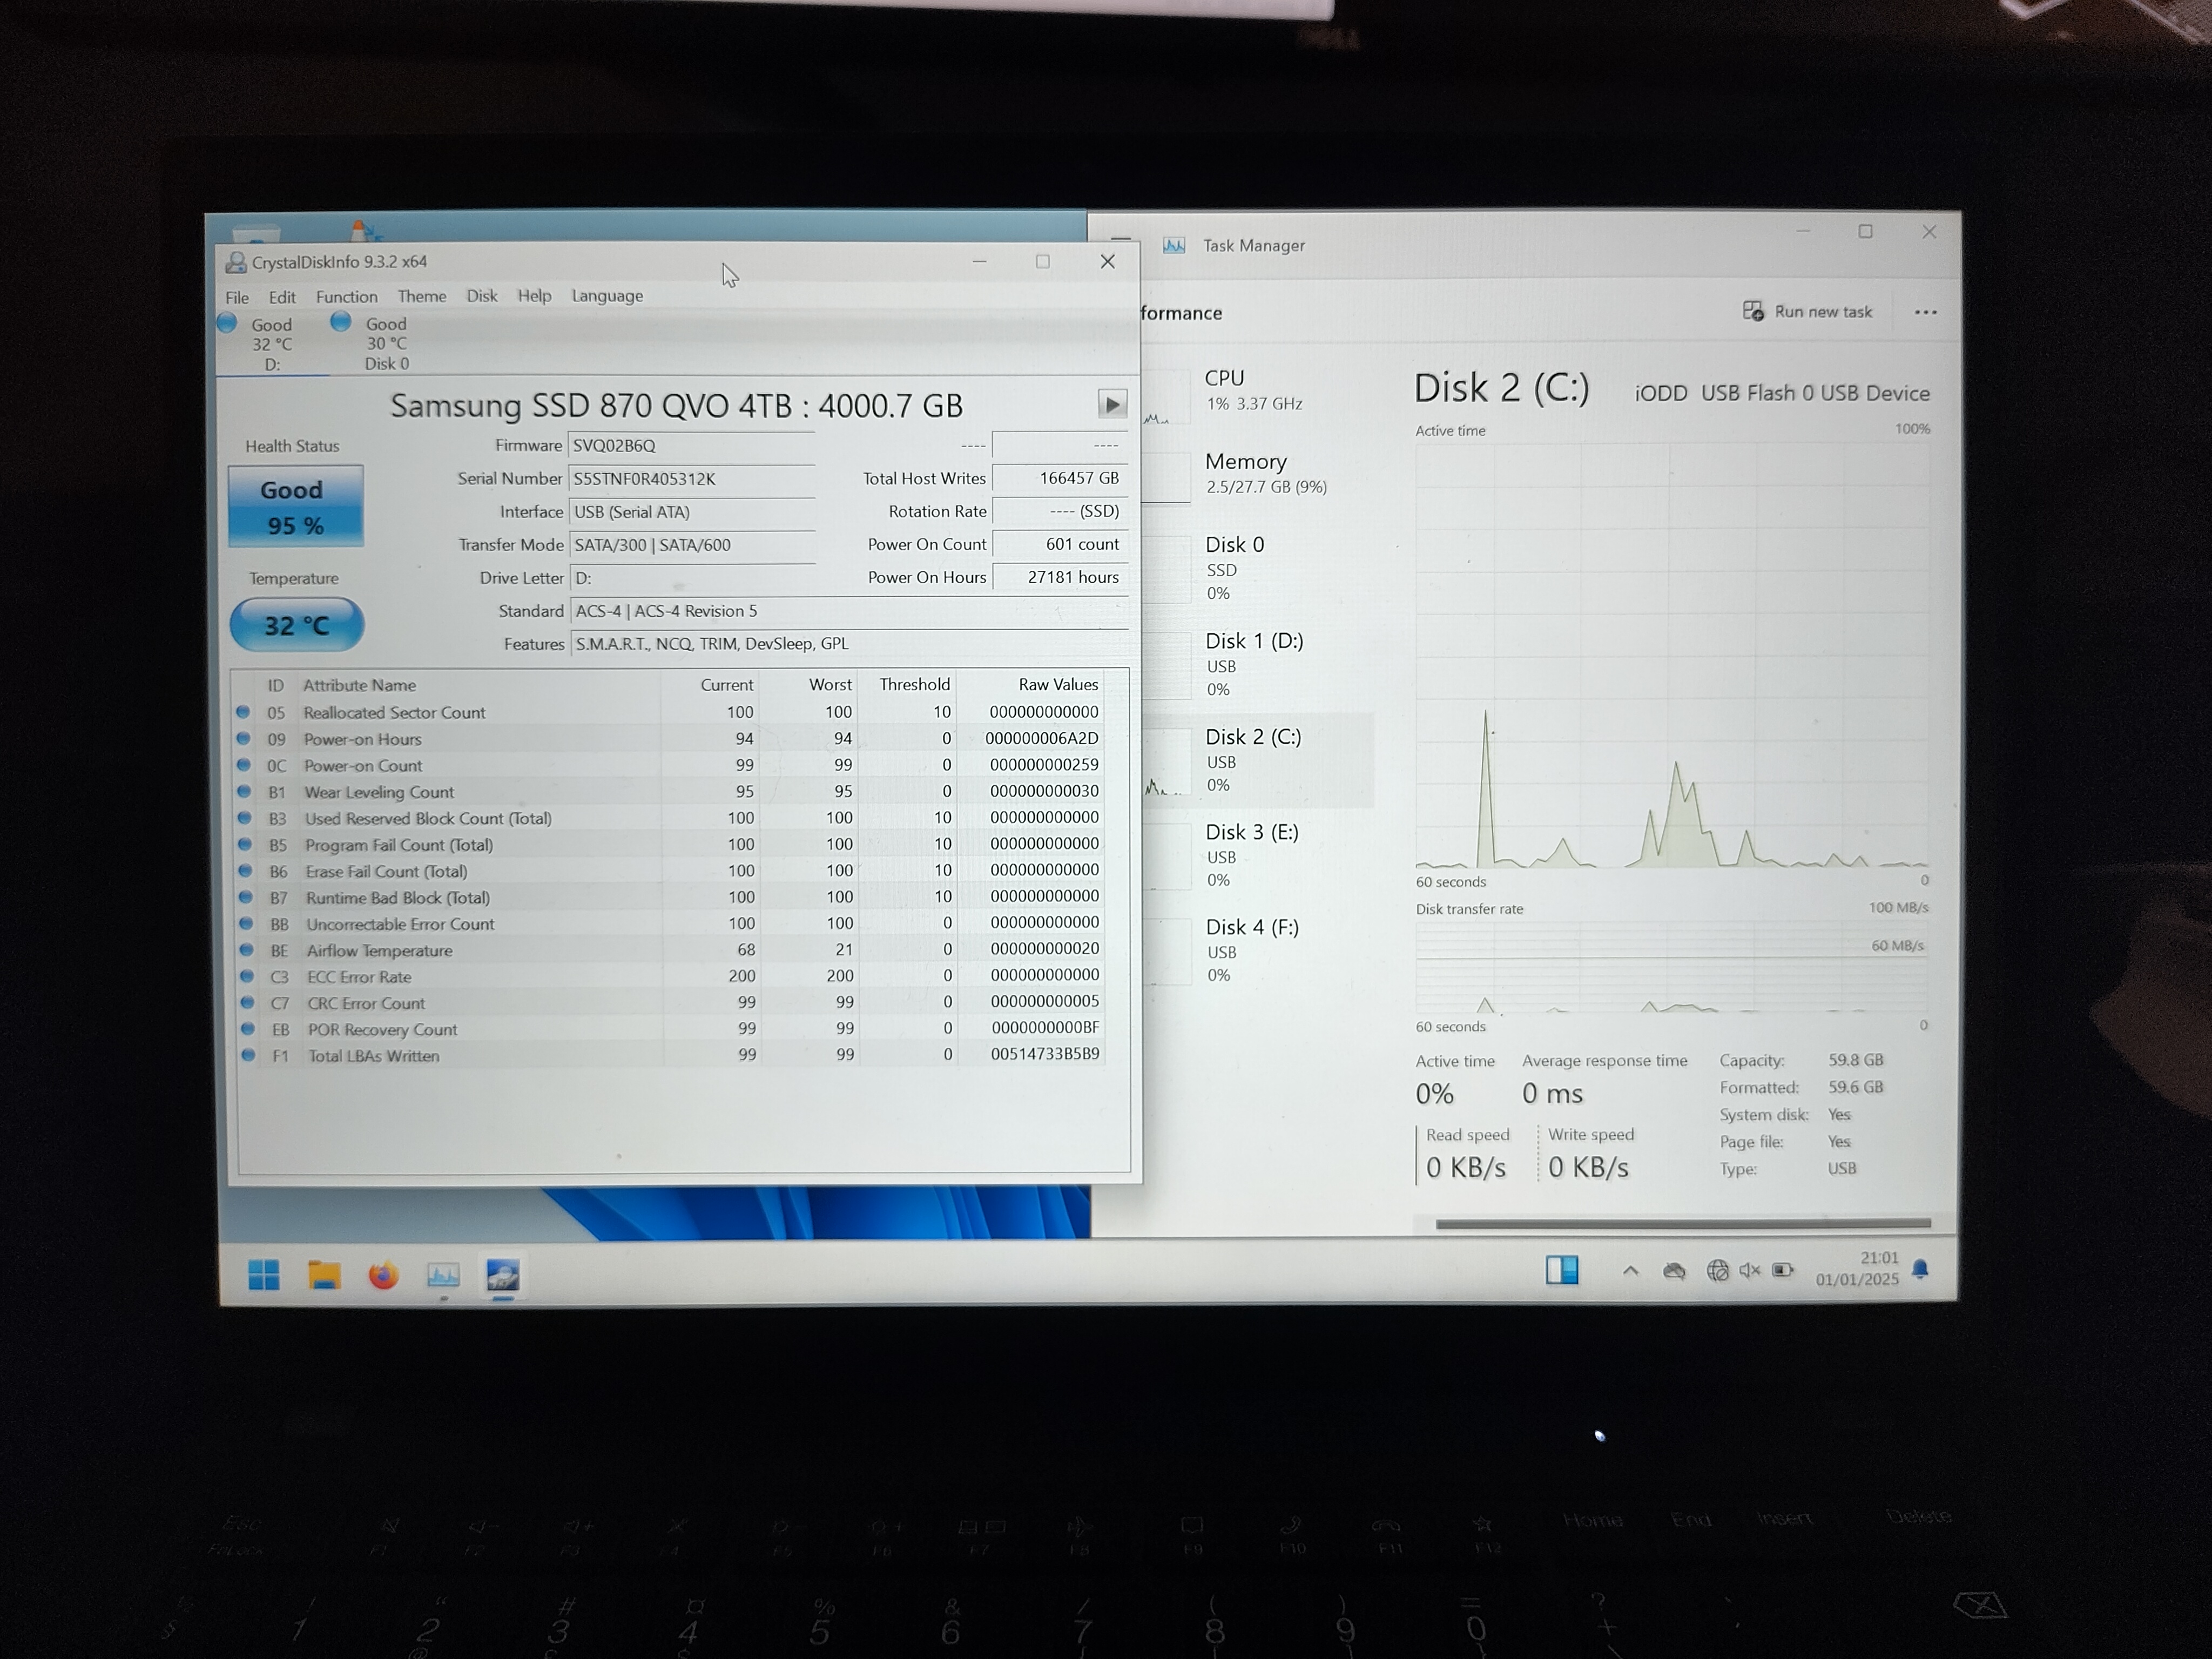
S.M.A.R.T information also seems to be passed through properly for the disk that’s inside.
Tech tip: to automatically mount your current selection of virtual drives and ISO file at boot, hold down the “9” button for about 3 seconds. The button also has an exit logo on it. Without this step, booting an ISO or virtual drive becomes tricky as you’ll have to both spam the “select boot drive” key on the PC while navigating the menus on the IODD device to mount the ISO.
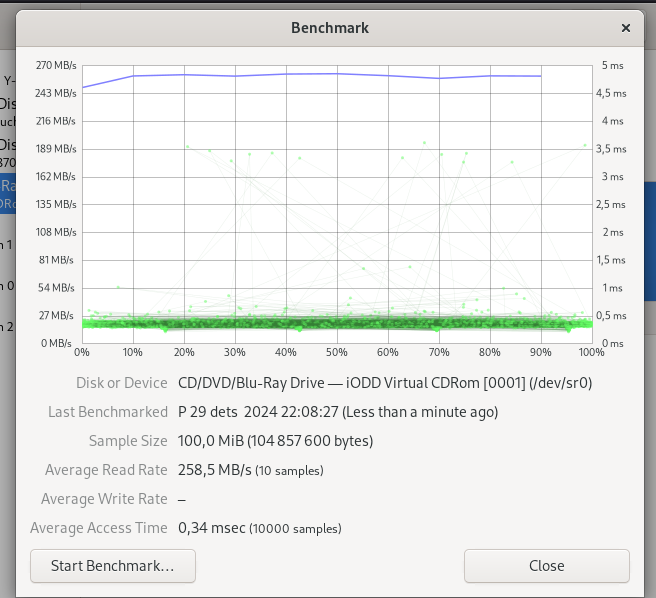
The performance is okay. The drive speeds are limited to SATA II speeds, which means that your read/write speeds cap out at about 250 MB/s. Latency will depend a lot on the drive, but it stays mostly in the sub-millisecond range on my SSD. The GNOME Disks benchmark does show a notable chunk of reads having a 5 millisecond latency. The drive does not seem to exhibit any throttling under sustained loads, so at least it’s better than a normal USB stick.
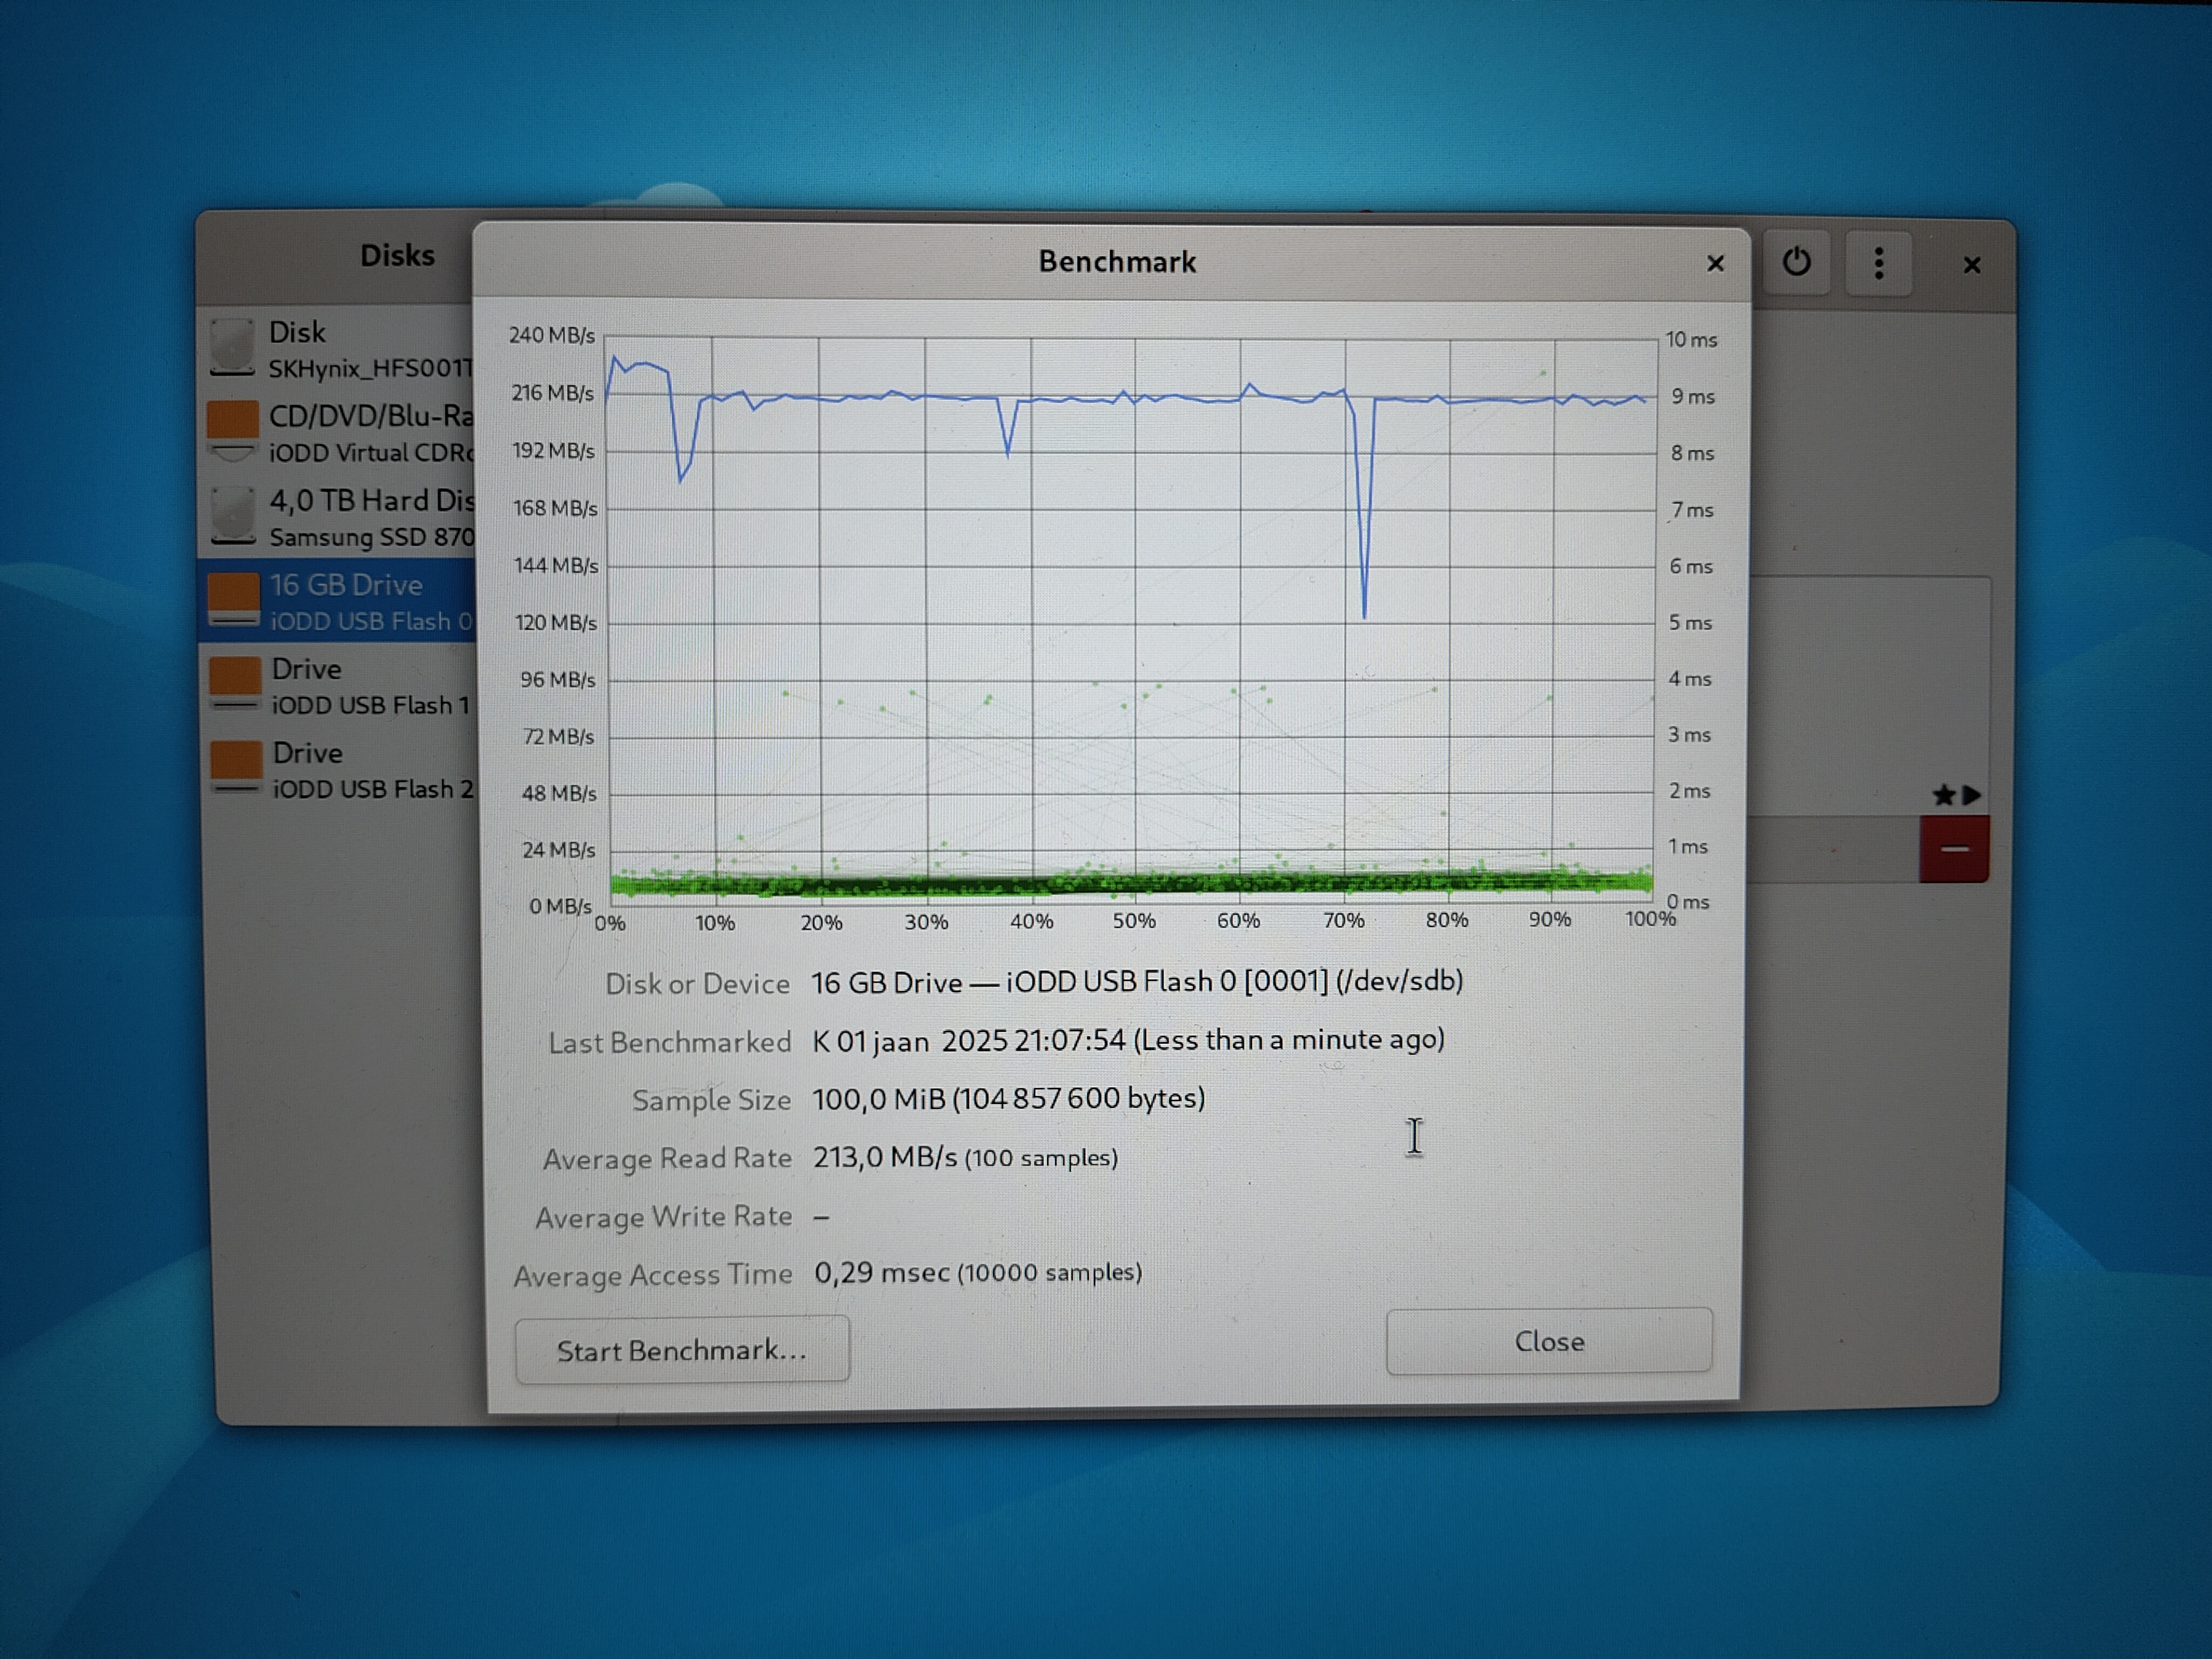
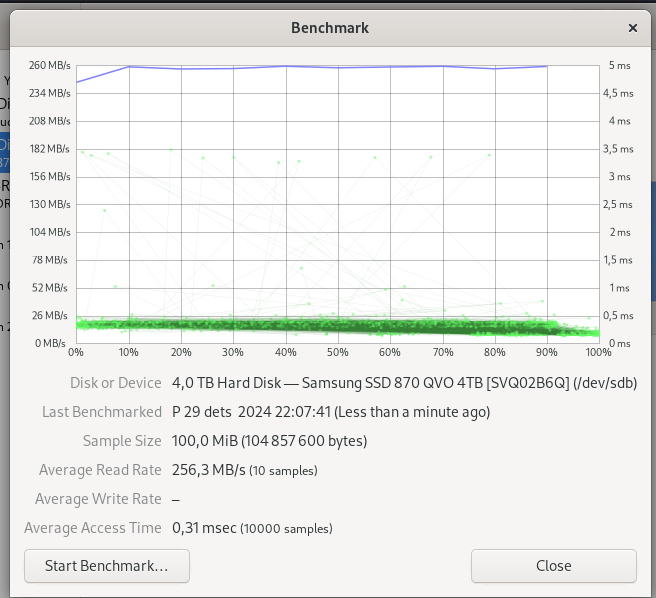
The speeds seem to be the same for all emulated devices, with latencies and speeds being within spitting distance.
The firmware sucks, actually
The IODD ST400 is a great idea that’s been turned into a good product, but the firmware is terrible enough to almost make me regret the purchase.
The choice of filesystems available (FAT32, NTFS, exFAT) is very Windows-centric, but at least it comes with the upside of being supported on most popular platforms, including Linux and Mac. Not great, not terrible.
The folder structure has some odd limitations. For example, you can only have 32 items within a folder. If you have more of that, you have to use nested folders. This sounds like a hard cap written somewhere within the device firmware itself. I’m unlikely to hit such limits myself and it doesn’t seem to affect the actual storage, just the device itself isn’t able to handle that many files within a directory listing.
The most annoying issue has turned out to be defragmentation.
In 2025!
It’s a known limitation that’s handily documented on the IODD documentation. On Windows, you can fix it by using a disk defragmentation tool, which is really not recommended on an SSD. On Linux, I have not yet found a way to do that, so I’ve resorted to simply making a backup of the contents of the drive, formatting the disk, and copying it all back again. This is a frustrating issue that only comes up when you try to use a virtual hard drive. It would absolutely suck to hit this error while in the field.

The way virtual drives are handled is also less than ideal. You can only use fixed VHD files that are not sparse, which seems to again be a limitation of the firmware.
Tech tip: if you’re on Linux and want to convert a raw disk image (such as a disk copied with dd) to a VHD file, you
can use a command like this one:
qemu-img convert -f raw -O vpc -o subformat=fixed,force_size source.img target.vhd
The firmware really is the worst part of this device. What I would love to see is a device like IODD but with free and open source firmware. Ventoy has proven that there is a market for a solution that makes juggling installation media easy, but it can’t emulate hardware devices. An IODD-like device can.
Encryption and other features
I didn’t test those because I don’t really need those features myself, I really don’t need to protect my Linux installers from prying eyes.
Conclusion
The IODD ST400 is a good device with a proven market, but the firmware makes me refrain from outright recommending it to everyone, at least not at this price.
If it were to cost something like 30-50 EUR/USD, I would not mind the firmware issues at all.
Subscribe to new posts via the RSS feed.
Not sure what RSS is, or how to get started? Check this guide!
You can reach me via e-mail or LinkedIn.
If you liked this post, consider sharing it!