How to build a fleet of networked offsite backups using Linux, WireGuard and rsync

Just like most people out there, I have some files that are irreplaceable, such as cat pictures.
At one point I had a few single-board computers sitting idle, namely the Orange Pi Zero and the LattePanda V1, and a few 1TB SSD-s.
I hate idle hardware, so I did the most sensible thing and assembled a fleet of networked offsite backups for backing up the most important data.
My setup is based on various flavors of Linux, but the ideas will likely translate well onto other operating systems and solutions.
Networking
The most important part is the networking. The offsite backup endpoints connect together to my home server over a WireGuard network. The home server is, well, the server, and backup endpoints are clients.
I like this WireGuard Docker image a lot because it generates the server and client configurations automatically, but you can use plain WireGuard or a completely different networking solution to connect all the devices together. Some use Tailscale to make the setup process easier, but I like to keep things as self-hosted as possible.
I’m not a networking expert, but here’s how I’ve set up my network. For this example, the WireGuard network operates in
the 10.13.69.0/24 range.1
To only allow traffic between the devices and avoid tunneling everything through the home server, set the AllowedIPs
setting to AllowedIPs = 10.13.69.0/24,10.13.69.1. We want to be able to access the backup endpoints, and nothing more.
All the devices have a static IP address in that network, such as 10.13.69.1 for the home server, 10.13.69.2 for a
backup endpoint and so on.
The PersistentKeepalive = 25 option is present in the client configurations so that I don’t lose the ability to access
the backup endpoints. With it, all the backup endpoints call back to the home server from time to time. The
aforementioned Docker image automatically adds it to the generated configuration using
the PERSISTENTKEEPALIVE_PEERS=all option.
This setting is crucial. Without it, I sometimes ran into problems trying to connect from my home server to the
backup endpoint, and that’s something you can’t easily alleviate without having physical access to the backup endpoints,
which are offsite.
Remove the DNS configuration from generated WireGuard client configurations, as you don’t need it for this purpose.
Optionally, edit the /etc/hosts file for the home server and backup endpoints so that you can access your backup
endpoints using simple hostnames, like orangepizero. Example row can look like this: 10.13.69.6 orangepizero.
if your WireGuard server operates in a network with a dynamic external IP address, as is common with many home internet connections, I recommend getting yourself a domain name that you can update whenever your IP address changes and using that in your WireGuard client configurations. Without this, an IP address change will result in your backup endpoints being inaccessible.
You’ll also likely need to set up port forwarding and/or traffic rules for your backup endpoints to be able to connect back to your WireGuard server.
Once you have the WireGuard connection set up and SSH running on the backup endpoints, you should be able to drop the backup endpoints into any network that you have permission for. Ask your friends and family, and sweeten the deal by offering free technical support or help in some other area in return. The cost of running a single-board computer 24/7 is minuscule with the typical power consumption being 1-3W, so that won’t be much of a concern.
Making backups
For making the actual backups themselves, you have all sorts of options.
I rely on rsync to copy the data over. It’s simple and it works, that’s all I expect from it.
Example command: rsync -aAXvz /folder/to/back/up/ backupuser@backupendpoint:/backup/ --delete.
The files will be compressed during transit with the -z option, and with --delete you’ll ensure that the target
folder has all the files from the source, and nothing else.
The backup storage is specified in /etc/fstab with the nofail option present. This ensures that in case the disk
dies, the backup endpoint will still boot properly, allowing me to access the machine to troubleshoot the issue and/or
force a desperate reboot to try to fix things. A good alternative approach is to mount/unmount the remote disk manually
as part
of the backup script.
The backup storage uses the btrfs filesystem, and I use btrbk to take snapshots of the contents. If I accidentally
delete all the files on the backup endpoint, then I can still recover from that situation because the data is still
present in snapshots. 30 days is a good retention period: enough time to save the data in case of an accidental
deletion, but short
enough to avoid the backup disk getting full.
If you don’t want to use filesystem-level snapshots, then tools like restic are a good alternative. It can also
operate
over SSH and you can configure snapshot retention policies in your backup script. Just make sure to not lose the
encryption password, and
verify the backups once in a while.
Deployment
I manage my backup endpoints using some cobbled-together Ansible roles. I’ve perfected it to the point where the only manual steps are flashing the OS and setting up the storage, the rest is handled via Ansible.
I’d like to share my work here, but it will make Jeff Geerling cry. Maybe one day I’ll take the time to improve things…
Maintenance
All the backup endpoints update and reboot themselves regularly. It’s just the sensible thing to do.
Every 6-12 months I also do major OS version updates. It’s risky because of the whole offsite aspect of the solution, but so far I haven’t been burned yet.
Monitoring
Monitoring is an area where I have some room for improvement. So far, I’ve set up Prometheus node-exporter to all of the backup endpoints, and my home server keeps track of how the backup endpoints are doing.
This allows me to check once in a while if any of the backup endpoints has fallen off the network, or if the backup disk is getting full.
Issues I’ve faced
I’ve had this system running for a few years now, and it’s mostly stable! There have been some issues I’ve faced as well, though. Some are very specific to certain hardware, but I think there’s value in mentioning them.
I once blew up a backup server because of an Ansible configuration issue. That meant that I had to physically go pick up the server to re-image it.
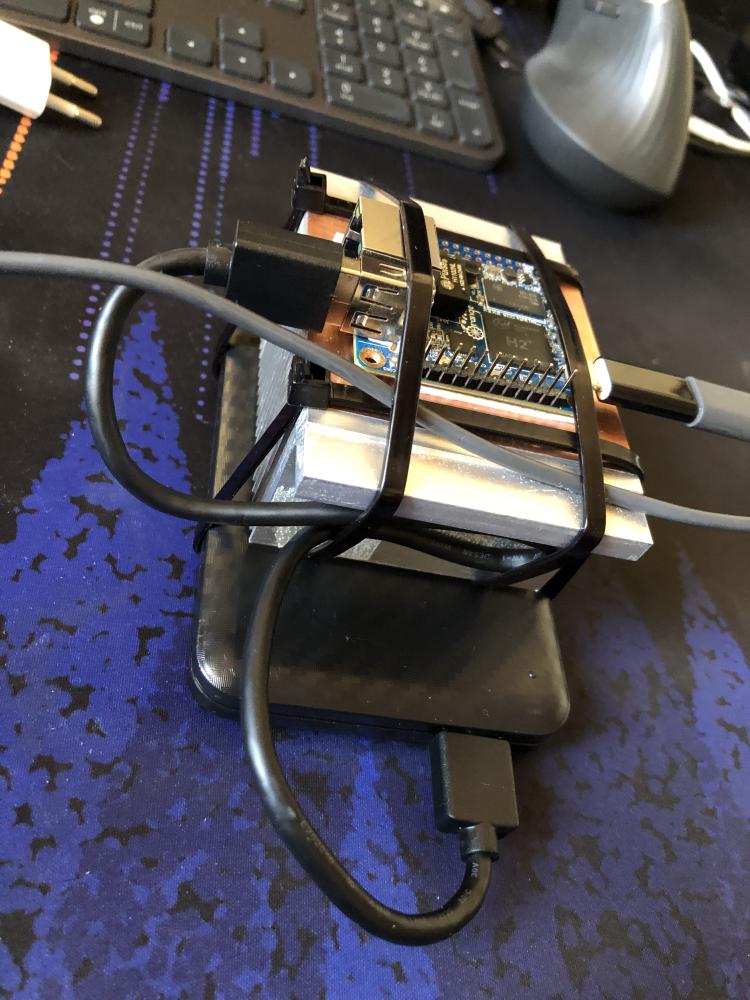
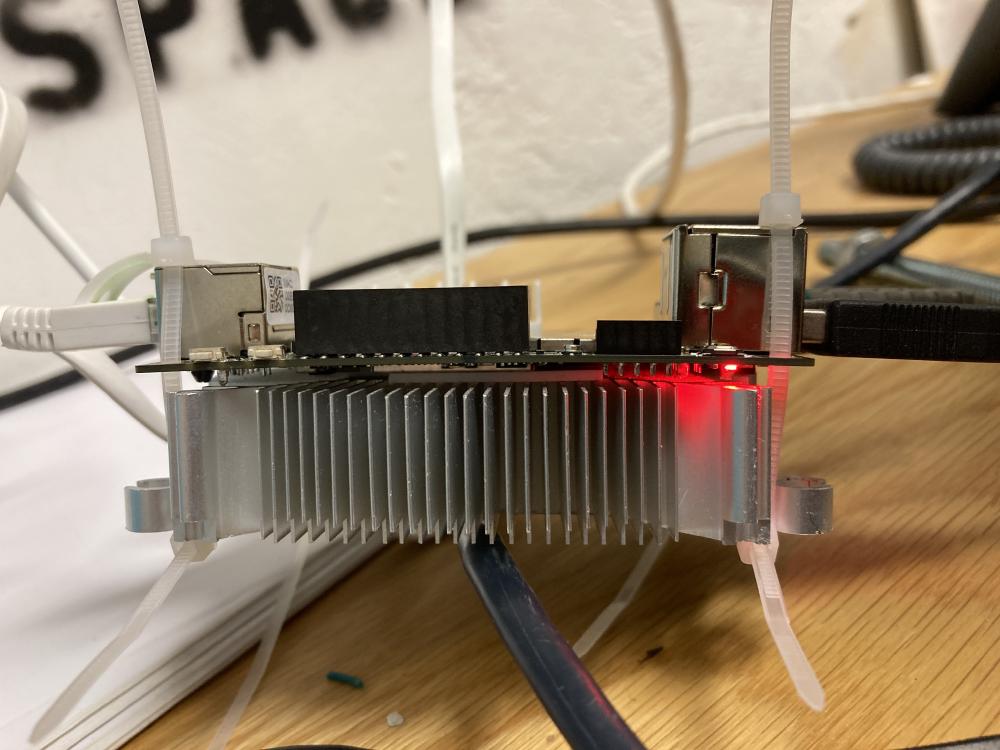
The Orange Pi Zero was running quite hot, resulting in stability issues, so I put together a really janky cooling solution.

Hell, I did the same for the LattePanda as well.

It might look horrific but the extra cooling has fixed all the stability problems on both boards.
The lack of a real-time clock on the LattePanda has required me to make its backup script a bit special. I can’t rely on a systemd timer that automatically reboots the machine once in a while, so instead that part is present in the backup script. The issue is that the LattePanda boots up with the time being set in the past, and once it gets the actual time from the network, it will run all sorts of tasks because enough time has passed! This included the reboot timer as well.
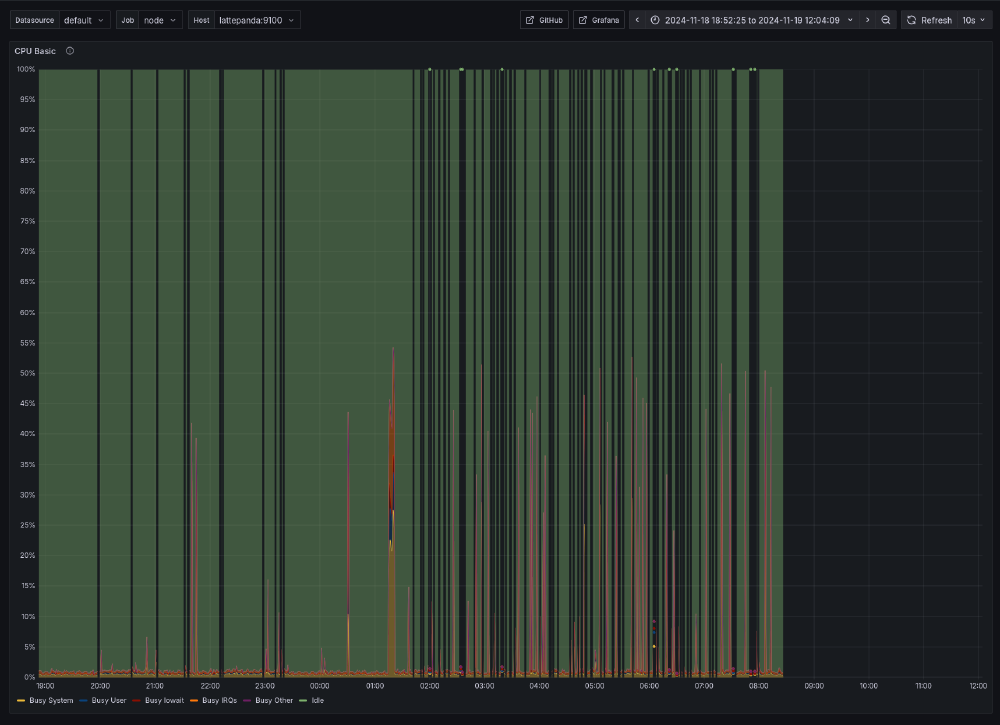
At one point, the power supply on the LattePanda just died, and it was very visible on my graphs. That required a replacement.

Conclusion
That’s how I back up the most important data. I hope that this has given you inspiration to take your own backup approach to the next level!
-
yes, I do plan to move this setup to IPv6 eventually. ↩︎
Subscribe to new posts via the RSS feed.
Not sure what RSS is, or how to get started? Check this guide!
You can reach me via e-mail or LinkedIn.
If you liked this post, consider sharing it!